Most homeowners keep an eye out for the obvious threats: a burst pipe, a leaking roof, a cracked foundation. But the damage that quietly drains thousands of dollars from a home’s value rarely announces itself. It creeps in through invisible forces — the moisture in the air, the sunlight pouring through a south-facing window, the faint vibration of a running washing machine. By the time you notice warped floorboards, faded upholstery, or a seized faucet valve, the process has been running for months or years.
This guide covers seven of the most destructive hidden causes of everyday home wear, what they actually damage, and — most importantly — the specific steps you can take to stop them before you’re writing a check to a contractor.
1. Humidity Fluctuations
Humidity is one of the most damaging and least watched forces in any home. The problem isn’t just high humidity — it’s the constant swinging between dry and wet air that causes wood, paint, and building materials to expand and contract over and over again until they fail.
What It Damages
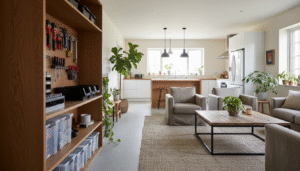
Hardwood and engineered wood floors are particularly vulnerable. When indoor relative humidity rises above 55%, wood absorbs moisture and expands. When humidity drops below 35%, it releases moisture and contracts. This cycle causes gaps between planks in winter and cupping or buckling in summer. A solid hardwood floor installed in a home without humidity control can develop permanent warping within two to three years.
Interior doors are another casualty. A door that suddenly sticks in July and swings freely in January isn’t settling — it’s swelling. Repeated swelling and drying stresses the door frame, the hinges, and the finish. Over time, the door itself can warp permanently and no longer close correctly.
High humidity also creates the conditions mold needs to grow. Mold can establish itself on any organic surface — drywall, wood framing, insulation, even grout — when relative humidity stays above 60% for extended periods. Once established, mold remediation typically costs between $1,500 and $5,000 depending on the extent of the infestation.
How to Prevent It
Target a year-round indoor relative humidity between 40% and 50%. This range keeps wood stable, discourages mold, and is comfortable for occupants. A $15 digital hygrometer placed in each floor of the home gives you real-time readings so you’re not guessing.
In summer, use a standalone dehumidifier (look for units rated at 50 pints per day for a typical basement or main floor, like the Frigidaire FFAD5033W1 or the hOmeLabs HME020031N) and run your air conditioning, which removes moisture as a side effect of cooling. In winter in dry climates, a whole-house humidifier attached to your HVAC system — or portable ultrasonic humidifiers in living areas — keeps humidity from dropping too low.
In bathrooms and kitchens, run exhaust fans every time you shower or cook and keep them running for at least 20 minutes after you finish. If your bathroom fan sounds like a jet engine or has never been cleaned, it may no longer be moving enough air. A bathroom exhaust fan should be rated for the room’s square footage — the standard formula is 1 CFM per square foot of bathroom area.
2. UV Sunlight Through Windows
What It Damages
Ultraviolet radiation from sunlight causes a chemical process called photodegradation. It breaks down the molecular bonds in dyes, pigments, and polymers. The result is fading, cracking, and brittleness in materials that looked fine when they were new.
Hardwood flooring in direct sun exposure can fade noticeably within six months. The fading isn’t even — furniture and rugs block the light in places, creating a patchwork of original and bleached tones that becomes obvious when you rearrange the room. Refinishing a hardwood floor to correct UV fading costs between $3 and $8 per square foot.
Upholstered furniture in sun-facing rooms fades and weakens. Leather cracks. Interior paint on sun-drenched walls fades faster than shaded walls, creating uneven tones over time. Window sills themselves, if painted, will chalk and peel faster on south and west exposures.
How to Prevent It
UV-blocking window film is the most effective and affordable solution. Films like 3M Prestige Window Film or Gila Heat Control Platinum block up to 99% of UV radiation while remaining nearly transparent — they don’t significantly affect natural light levels or views. Professional installation costs $5–$15 per square foot, but DIY film kits are widely available for $1–$3 per square foot and can be applied with a squeegee and soapy water.
Cellular shades and solar shades on south and west-facing windows give you flexible UV control — close them during peak sun hours (10am–3pm) and open them at other times. For rooms where UV film isn’t practical, position furniture and rugs away from direct sun paths, or rotate them periodically so exposure is even.
Check exterior overhangs and awnings on south-facing windows. A properly sized overhang blocks summer sun when the sun is high but allows winter sun when the sun is low — a passive benefit that also reduces cooling loads.
3. Hard Water Mineral Deposits
What It Damages
Hard water contains dissolved calcium and magnesium minerals. Every time hard water moves through your plumbing and evaporates, it leaves those minerals behind as white or gray scale deposits. Over time, scale accumulates inside pipes, restricting flow. It clogs showerhead nozzles, reduces water pressure, and eventually causes the rubber washers and O-rings inside faucets to fail prematurely — because they’re working against resistance and grinding on mineral particles.
Water-using appliances suffer significantly. Scale buildup inside a water heater tank acts as an insulating layer between the burner and the water, forcing the unit to run longer to achieve the same temperature. The Department of Energy estimates that scale buildup of just 1/4 inch reduces a water heater’s efficiency by up to 40% and shortens its lifespan. Dishwashers develop etched glassware and cloudy interiors. Coffee makers and electric kettles scale up and eventually fail.
How to Prevent It
For showerheads: remove the head once a month, submerge it in white vinegar for 30–60 minutes, then scrub with an old toothbrush and rinse. This dissolves calcium deposits before they harden into a cement-like crust. For faucet aerators, unscrew the tip, soak in vinegar, and reinstall.
Flush your water heater once a year to remove sediment. Attach a garden hose to the drain valve at the bottom, run it to a floor drain or outdoors, and let it drain until the water runs clear. This takes about 20 minutes and eliminates the sediment layer that reduces efficiency and causes the “popping” sounds you hear from an old heater.
For homes with hard water (above 7 grains per gallon — your water utility can tell you this, or you can use a $10 test strip kit), a whole-house water softener is the most comprehensive solution. Salt-based ion exchange softeners like the Fleck 5600SXT remove calcium and magnesium before they reach your fixtures and appliances. The upfront cost is $800–$2,000 installed, but the protection to plumbing, appliances, and fixtures typically pays back within 5–7 years.
If a softener isn’t in the budget, use a magnetic or electronic descaler on the incoming water line (GreenWave, iSpring, or similar brands cost $80–$200). These don’t remove minerals but alter their crystalline structure so they’re less likely to adhere to surfaces.
4. Foot Traffic Patterns
What It Damages
Every step on a finished floor introduces two types of wear: abrasion from the sole of the shoe or foot, and micro-scratch from grit and debris tracked in from outside. The finish coat on hardwood floors — typically polyurethane — is only a few thousandths of an inch thick. In high-traffic paths like hallways, kitchen work zones, and living room aisles, this finish can wear through to bare wood within three to five years of installation.
Once the finish wears through, the bare wood is exposed to moisture, staining, and deeper abrasion. Refinishing a floor before the finish wears through requires only a light screen-and-recoat, costing $1–$2 per square foot. Waiting until bare wood is exposed requires a full sand-and-refinish at $3–$8 per square foot, and in some cases, boards may have worn too thin to be sanded at all.
How to Prevent It
Area rugs in high-traffic zones are the single most effective floor protection measure. A rug in the main hallway, at the kitchen sink, and in the primary living room walkway intercepts the majority of abrasive contact. Use a rug pad underneath — both to prevent the rug from slipping and to prevent the rubber or latex backing of some rugs from chemically reacting with the floor finish over time.
Apply felt furniture pads to every chair leg, table leg, and heavy piece of furniture. Check and replace these annually — pads accumulate grit on the bottom over time and eventually become more abrasive than protective. Self-adhesive felt pads (like those from Shepherd Hardware or X-PROTECTOR) cost less than $10 for a pack and take five minutes to apply.
Schedule a screen-and-recoat on hardwood floors every 3–5 years before finish wear becomes visible. This is a light abrasion of the existing finish followed by a fresh coat of polyurethane — no sanding to bare wood, no stain matching, no days of airing out. It resets the clock on your finish and can be done floor by floor without evacuating the house.
5. Appliance Vibration
What It Damages
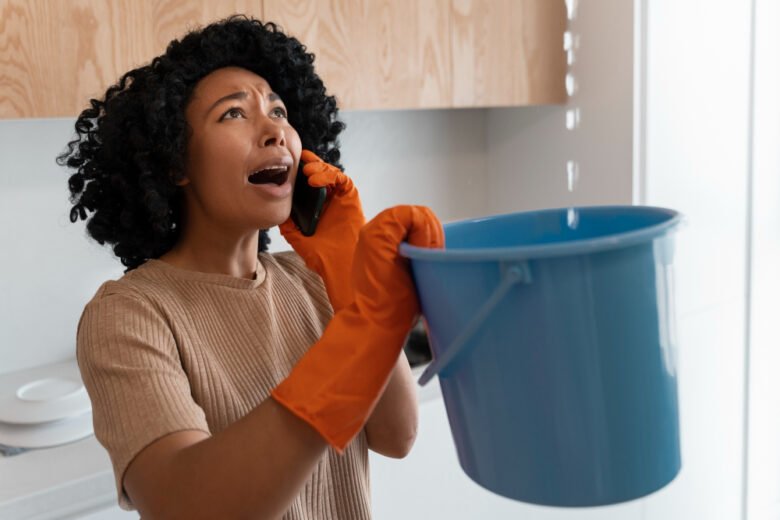
Washing machines during the spin cycle, dishwashers on certain programs, and refrigerators with uneven compressors all generate repetitive vibration. This seems minor, but vibration is cumulative. Over months and years, it loosens hose connections on washing machines (a common cause of catastrophic flooding when homeowners are away), loosens supply line fittings under dishwashers, and rattles cabinet hardware loose on nearby cabinets.
In laundry rooms where the washer sits on a raised platform or upper floor, an out-of-balance spin cycle can transmit enough vibration to crack grout around nearby tiles, vibrate open cabinet doors, and in extreme cases, cause the unit to “walk” and pull its water supply lines taut.
How to Prevent It
Place anti-vibration pads under your washing machine and dryer. Brands like Steadyware and SmartChoice make rubber anti-vibration feet that replace or supplement the standard legs, absorbing the vibration before it transfers to the floor. These cost $15–$30 and take ten minutes to install.
Level your washer precisely using a bubble level. An unlevel machine vibrates dramatically more during the spin cycle than a correctly leveled one. Most washers have adjustable front feet — turn them clockwise to raise a corner, counterclockwise to lower it. Check annually, as the feet can drift on vibration-prone surfaces.
Inspect washing machine supply hoses once a year. Look for bulging, cracking, or stiffness at the fittings. Rubber hoses should be replaced every 5 years regardless of appearance; stainless steel braided hoses (which cost only $20–$30 for a pair) are significantly more durable and are recommended for any machine left unattended for extended periods.
6. Pest Entry Through Small Gaps
What It Damages
Termites cause an estimated $5 billion in property damage in the United States every year — more than fires, floods, and storms combined. Mice can fit through a gap the size of a dime and can gnaw through electrical wiring insulation, causing shorts and fire hazards. Carpenter ants hollow out wood framing. Ground squirrels and chipmunks undermine concrete stoops and foundations. In every case, the damage compounds the longer it goes undetected.
Entry points are usually mundane: gaps around utility penetrations (where pipes, wires, and HVAC lines pass through the foundation or siding), cracks in the foundation sill plate, gaps under garage doors, and deteriorated weatherstripping around exterior doors.
How to Prevent It
Conduct an annual perimeter inspection of your home’s exterior at ground level. You’re looking for any gap wider than 1/4 inch (the diameter of a pencil) in the foundation, siding, soffit, or around penetrations. Do this in spring when the ground is dry and before insect activity peaks.
For gaps under 1/4 inch, use paintable acrylic latex caulk for exterior surfaces or silicone caulk for areas with moisture exposure. For gaps between 1/4 inch and 1/2 inch, use expanding foam sealant (Great Stuff is widely available and reliable) before covering with caulk. For gaps larger than 1/2 inch around pipes and wires, pack with copper mesh or steel wool first — neither mice nor insects can chew through steel wool — then seal over with caulk or foam.
Keep mulch and wood debris at least 6 inches away from your foundation. Termite colonies travel through wood-to-soil contact and use mulch piles and woodpile stacks as staging areas. If you use mulch in foundation beds, switch to a non-organic option like rubber mulch or river rock in the 12-inch zone immediately adjacent to the home.
Schedule a termite inspection every two to three years if you live in a termite-prone region (the Southeast, Southwest, and much of the mid-Atlantic and Gulf Coast). A licensed pest inspector charges $75–$150 for an inspection and can identify active infestations or evidence of past activity before structural damage becomes significant.
7. Poor Ventilation in the Attic and Crawlspace
What It Damages
An attic or crawlspace that doesn’t breathe becomes a moisture trap. In summer, an unventilated attic can reach 150°F or more, accelerating the degradation of roof shingles from below and shortening the roof’s lifespan by years. In winter, warm moist air from the living space rises into the attic, hits the cold roof decking, and condenses — saturating insulation, feeding mold growth on the roof sheathing, and eventually causing wood rot in rafters.
In crawlspaces, ground moisture evaporates upward into the enclosed space. Without ventilation or a vapor barrier, this moisture saturates floor joists and subfloor panels, causing rot, sagging floors, and conditions that attract termites and carpenter ants. Crawlspace remediation — replacing rotted joists, installing vapor barriers, and treating for pests — commonly runs $5,000–$15,000.
How to Prevent It
For attics, the standard ventilation guideline is 1 square foot of net free ventilation area (NFVA) for every 150 square feet of attic floor space, split equally between low intake vents (soffit vents) and high exhaust vents (ridge vents or gable vents). If your attic has only one type of vent, air circulation is compromised. A roofing contractor can add ridge venting or additional soffit vents for a few hundred dollars — far less than the cost of replacing rot-damaged sheathing.
Inspect your attic vents once a year to make sure they haven’t been blocked by insulation, bird nests, or debris. Soffit vents are a particularly common victim — loose-fill insulation blown into the attic often gets pushed to the eaves and blocks intake vents completely. Attic vent baffles (also called rafter baffles or insulation dams) are foam or cardboard channels stapled between rafters to keep the soffit vents clear. They cost under $2 each at any home center and are a 30-minute DIY project.
For crawlspaces, install a 6-mil polyethylene vapor barrier across the entire ground surface, lapping it up the foundation walls and securing it with construction adhesive or mechanical fasteners. This alone dramatically reduces ground moisture evaporation. If your crawlspace has foundation vents, verify they open and close properly — close them in winter in cold climates to prevent pipes from freezing, and open them in warm weather to allow summer ventilation.
In climates with high groundwater or chronic crawlspace moisture, consider converting to an encapsulated crawlspace with a conditioned air supply — essentially sealing and insulating the crawlspace walls and treating it as a conditioned zone. This eliminates the moisture problem entirely and is the approach most building scientists now recommend for new construction in humid climates. The upgrade typically costs $5,000–$10,000 but eliminates crawlspace-related moisture issues for the life of the structure.
Putting It All Together: A Prevention Mindset
None of these seven causes of wear requires a contractor on speed dial or a large maintenance budget. What they require is awareness and a basic inspection schedule. The homeowners who spend the least on repairs over time aren’t lucky — they’re consistent. They check the crawlspace once a year. They replace washing machine hoses before they fail. They close the bathroom door and run the exhaust fan. They put down a rug before the finish wears through.
The math is straightforward. A $15 hygrometer prevents floor warping. A $25 tube of caulk prevents pest entry. A $20 pair of braided steel washing machine hoses prevents a flood. The causes of everyday wear are hidden — but the solutions are almost always cheap, simple, and fast. The only variable is whether you act before or after the damage is done.
The damage that costs the most to fix is almost never the kind that happens all at once. It’s the kind that happens slowly, invisibly, while you’re not paying attention.
Quick Reference: Hidden Causes and Solutions
- Humidity fluctuations — Target 40–50% RH; use a dehumidifier, run exhaust fans 20+ minutes after showers, monitor with a digital hygrometer
- UV sunlight — Apply UV-blocking window film on south/west windows; use solar shades during peak hours
- Hard water deposits — Monthly vinegar soaks on showerheads; annual water heater flush; consider a whole-house softener for water above 7 GPG
- Foot traffic — Area rugs in high-traffic zones; felt pads on all furniture; schedule a screen-and-recoat every 3–5 years
- Appliance vibration — Anti-vibration pads; level your washer; replace rubber hoses with braided stainless steel every 5 years
- Pest entry — Annual perimeter inspection; seal gaps under 1/4 inch with caulk; steel wool + foam for larger gaps; keep wood debris away from foundation
- Attic/crawlspace ventilation — Verify 1 NFVA per 150 sq ft of attic; install rafter baffles; lay a 6-mil vapor barrier in crawlspace

Ava Harrington is a home improvement writer and DIY enthusiast with over eight years of hands-on experience maintaining, renovating, and documenting residential properties across the United States. She writes practical, no-fluff guides on home care, preventive maintenance, and everyday repairs — helping homeowners protect their properties without overspending or overcompleting.