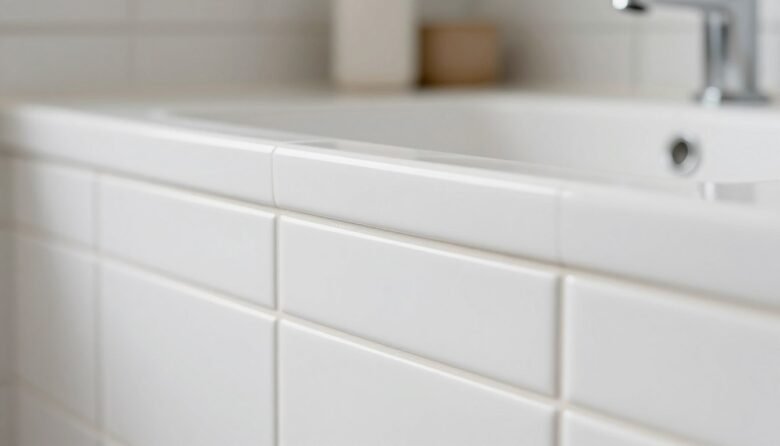
Grout might be the hardest-working surface in your home that nobody thinks about until it looks terrible. What starts as crisp white or light gray lines between tiles quietly darkens over months and years — picking up soap scum, mold, mildew, foot traffic dirt, and cooking grease — until the entire floor or shower wall looks permanently grimy no matter how much you clean the tiles themselves.
The secret to cleaning grout efficiently isn’t elbow grease — it’s using the right chemistry or technology for the type of dirt you’re dealing with, and letting the cleaning agent do the work before you ever pick up a brush. This guide covers four proven cleaning methods, tells you what not to use and why, and sets you up with a maintenance routine that keeps grout cleaner for longer.
Why Grout Gets Dirty So Fast
Understanding why grout discolors helps you choose the right cleaning method and the right prevention strategy.
Cement-based grout — which is the type used in the vast majority of residential tile installations — is inherently porous. Unlike the glazed tile surface beside it, grout has a rough, micro-textured structure full of tiny pores and channels. These pores absorb moisture, cleaning product residue, soap scum, body oils, and airborne particles. Over time, this absorbed material stains the grout body itself, not just the surface — which is why wiping grout rarely makes it look clean.
In bathrooms, the combination of soap scum (a reaction between soap and hard water minerals) and humid conditions creates an ideal environment for mold and mildew growth — particularly in the grout lines of shower walls, where water sits and warmth persists. In kitchens, cooking grease becomes embedded in floor grout. In mudrooms and entryways, dirt particles get physically forced into the grout pores by foot traffic.
Unsealed grout absorbs everything aggressively. Properly sealed grout resists absorption significantly — which is why sealing after cleaning (covered later in this guide) is not optional maintenance but rather the key to keeping your grout clean long-term.
Method 1: Baking Soda Paste with Hydrogen Peroxide
This is the best starting method for moderately dirty grout in showers and bathroom floors. Baking soda is a mild alkaline abrasive that lifts surface-level staining and deodorizes, while hydrogen peroxide is a gentle oxidizing bleach that breaks down organic stains (mold, mildew, soap scum) without the harshness or pipe-damaging properties of chlorine bleach.
What You Need
- 1/2 cup baking soda
- 1/4 cup 3% hydrogen peroxide (standard drugstore variety)
- 1 tablespoon dish soap (optional — helps with grease-based grime)
- Stiff-bristled grout brush or old toothbrush
- Bowl for mixing
- Clean water for rinsing
Step-by-Step Instructions
- Mix the baking soda, hydrogen peroxide, and dish soap in the bowl until you get a thick paste. The consistency should be similar to toothpaste — spreadable but not runny. Adjust with a little more baking soda if it’s too thin.
- Apply the paste generously along the grout lines using an old toothbrush, your finger, or a small spatula. Don’t rub yet — just get the paste into the grout channels and slightly mounded on top.
- Let the paste sit for 15 minutes minimum. For heavier staining or visible mold/mildew, leave it for 30–45 minutes. The hydrogen peroxide needs dwell time to oxidize and break down organic material. Longer contact = less scrubbing required.
- After the dwell time, use a stiff-bristled grout brush to scrub the paste into the grout with short, back-and-forth strokes directly along the grout line (not at a diagonal to the tiles). Apply moderate pressure — you should not need to scrub aggressively if the paste has had adequate dwell time.
- Rinse thoroughly with clean water. Wipe away residue with a clean damp cloth. The grout should look noticeably lighter.
- If some areas are still discolored, apply a second treatment focusing on those sections. Allow to dry completely, then assess in good lighting.
The dwell time is doing the actual work. If you find yourself scrubbing very hard, the paste hasn’t been left on long enough.
Method 2: Oxygen Bleach (OxiClean) Soak Method
Oxygen bleach — sold as OxiClean or under generic names as “sodium percarbonate” — is excellent for floor grout because it works by soaking rather than scrubbing. It releases hydrogen peroxide slowly over an extended dwell period, penetrating into the grout pores and lifting staining from within. This is the best method for large tiled floor areas where scrubbing every grout line by hand would take hours.
Unlike chlorine bleach, oxygen bleach is safe on colored grout, does not produce toxic fumes, and is safe for septic systems. It is not effective on mold — for mold in grout, use the baking soda/peroxide method above, or a dedicated mold-killing product.
Step-by-Step Instructions for Floor Grout
- Sweep or vacuum the floor thoroughly to remove loose dirt. Wet dry dirt turns to mud and gets pushed into grout during cleaning.
- Mix oxygen bleach powder with hot water according to package directions — typically 1 scoop per 16 oz of water. Hotter water activates the product more effectively; aim for water temperature around 140°F (hot from the tap, or warmed in a kettle and slightly cooled).
- Pour or mop the solution generously over the entire tiled floor, making sure all grout lines are saturated.
- Allow to soak for 30–60 minutes. For very dirty or long-neglected grout, allow up to 2 hours. Keep the solution wet — if it starts to dry, add more. The floor should remain visibly wet the entire time.
- After soaking, scrub with a stiff brush mop, a long-handled grout brush, or a scrub brush on stubborn spots. Because the oxygen bleach has loosened the embedded grime, you should find that scrubbing is minimal.
- Mop up the dirty solution and rinse the floor with clean water twice. Oxygen bleach leaves a residue that can be slippery when dry if not fully rinsed.
- Allow the floor to dry completely and assess grout color. A single treatment typically lightens grout significantly; a second treatment may be needed for heavily stained floors.
Method 3: Steam Cleaner
A steam cleaner is the best long-term tool for homes with significant tile areas — multiple bathrooms, a tiled kitchen floor, a mudroom. It uses no chemicals whatsoever: pressurized steam (typically 200–250°F) is forced into the grout pores, liquefying embedded grime and killing mold spores and bacteria on contact. The detached debris is then wiped away with a cloth.
Why Steam Works So Well on Grout
The high temperature penetrates deep into the porous grout structure and expands the microscopic channels slightly, allowing grime to release more easily than it would with room-temperature cleaning agents. Steam also sanitizes as it cleans — useful in shower environments where mold spores are a persistent issue.
Using a Steam Cleaner on Grout
- Use the detail brush or grout attachment that comes with most steam cleaners. Fill the tank with distilled water (reduces mineral deposits inside the machine) and allow it to fully heat up — typically 3–5 minutes.
- Hold the steam nozzle close to the grout line (1/2 to 1 inch away) and move slowly along the grout, allowing the steam to penetrate for a second or two in each spot before moving on.
- Immediately follow behind the steam head with a clean cloth or the machine’s wipe attachment to absorb the loosened debris. Don’t let it re-dry on the surface.
- For heavily stained grout, make two slow passes — the first loosens the grime, the second cleans the residue.
- A handheld steam cleaner adequate for grout work costs $40–$100. A full-size canister steam cleaner suitable for large floor areas runs $80–$200 and is a worthwhile investment if you have extensive tile in your home.
Important: Do not use a steam cleaner on natural stone tile (marble, travertine, slate). The heat and moisture can damage the stone surface and the stone’s sealant. Steam is safe on ceramic, porcelain, and glass tile.
Method 4: Grout Pen for Discoloration That Won’t Clean
Sometimes grout has been stained so deeply, or has discolored so unevenly, that no amount of cleaning restores a consistent appearance. In these cases, a grout pen (also called a grout colorant marker or grout paint pen) is a practical solution that gives grout a fresh, uniform appearance without regrout.
Grout pens contain a water-based, opaque colorant that coats the surface of the grout. They come in a range of standard grout colors (white, off-white, gray, beige, charcoal, and brown are the most common). They will not restore the original color of stained grout — they paint over it with a new, consistent color.
When to Use a Grout Pen
- Grout that is permanently stained (rust, dye, deep mold staining) and doesn’t respond to cleaning
- Grout that has yellowed or grayed unevenly with age
- As a visual refresh before listing a home for sale, without the cost and labor of regrout
How to Apply a Grout Pen
- Clean the grout thoroughly first with one of the methods above. The pen colorant adheres better to clean grout and won’t seal in active mold.
- Let the grout dry completely — at least 24 hours after wet cleaning. Applying colorant to damp grout results in poor adhesion and blotchy appearance.
- Shake the pen well before use. Apply the tip directly to the grout line and draw along it in one smooth stroke. The tip dispenses colorant as you draw.
- Wipe any colorant that gets on the tile surface with a damp cloth immediately — it’s easier to clean before it dries.
- Allow 30 minutes to dry, then apply a second coat for a more opaque, uniform finish.
- Allow 24 hours before exposing to water or foot traffic.
Expected lifespan: A quality grout pen application (brands like Mapei Grout Refresh or Rust-Oleum Grout Pen) lasts 2–5 years on floor grout and somewhat longer on wall grout, which faces less physical abrasion. It will need reapplication over time but is far less expensive than regrout ($0.30–$1 per linear foot of grout pen vs. $5–$25 per square foot for professional regrout).
What NOT to Use on Grout
Some commonly reached-for cleaning products can damage grout, tile, or both:
- Undiluted chlorine bleach on colored grout: Straight bleach will strip the pigment from colored or dark grout, leaving it blotchy and lightened. For white or light gray grout, diluted bleach (1 part bleach to 10 parts water) is acceptable for occasional stain treatment, but frequent use degrades the cement binder in grout over time.
- Vinegar on natural stone tile: White vinegar is sometimes recommended as a grout cleaner, and it is mildly effective on mineral deposits. However, on natural stone tile (marble, travertine, limestone, slate), acidic cleaners etch the stone surface, permanently dulling and damaging it. Never use vinegar on any installation with natural stone tiles.
- Wire brushes or metal scrub pads: Wire brushes scratch and damage the grout surface, creating more texture for grime to catch in — the opposite of what you want. They also scratch tile surfaces. Use only nylon-bristle grout brushes or stiff-bristle toothbrushes.
- Abrasive powders (like Comet) on glazed tile: These can leave fine scratches in the tile glaze that catch dirt and dull the tile’s appearance over time. They’re acceptable on unglazed quarry tile but not on ceramic or porcelain.
Floor Grout vs. Wall Grout: Different Approaches
Floor grout faces physical abrasion from foot traffic, which grinds dirt into the pores, and grease splatter in kitchen areas. The oxygen bleach soak method is particularly well-suited to floors because the solution can sit and penetrate without dripping. Steam cleaning also works very well on floors. Floor grout generally needs more aggressive treatment and more frequent sealing (every year in high-traffic areas).
Wall grout in showers primarily deals with soap scum, mold, and mildew. The baking soda/hydrogen peroxide paste method is ideal here because it’s applied as a paste that clings to vertical surfaces without dripping. Oxygen bleach solution will run off walls too quickly to be effective. Steam cleaning works well on shower walls for both cleaning and sanitizing. Shower grout in enclosed, poorly-ventilated showers is most vulnerable to mold — ventilation improvement (exhaust fan use, leaving the shower door open after use) is part of the long-term solution.
Grout Sealing After Cleaning
Cleaning grout without sealing it afterward is like washing a car and leaving it in the mud. The clean, open pores of freshly cleaned grout will absorb new grime more rapidly than grout that has never been cleaned — because the cleaning process also removes any residual sealer that may have been protecting it.
Why Sealer Matters
Grout sealer penetrates the porous grout surface and fills those microscopic channels with a water-repellent polymer. Sealed grout resists water, soap scum, and stain absorption significantly — meaning spills bead up on the surface instead of absorbing, and cleaning requires far less effort.
How to Apply Grout Sealer
- Clean the grout thoroughly and allow it to dry completely. Sealing over damp grout traps moisture inside and prevents proper penetration. Wait at least 48–72 hours after wet cleaning before sealing — longer in humid climates.
- Choose a penetrating/impregnating sealer rather than a topical coating sealer. Penetrating sealers absorb into the grout and last significantly longer without changing the appearance of the grout. Topical sealers sit on the surface, can look shiny, and peel with time.
- Apply the sealer using the applicator brush or applicator bottle that most products include. Draw the sealer along each grout line. Work in sections — about 10–15 square feet at a time — to ensure even coverage.
- Allow to penetrate for 5–10 minutes (check your product’s instructions), then wipe away any excess sealer from the tile surface with a clean cloth. Sealer left on tile can dry to a hazy film.
- Allow the first coat to dry for 30–60 minutes, then apply a second coat for better protection.
- Keep the area dry and avoid foot traffic for at least 24 hours — ideally 48–72 hours — to allow the sealer to fully cure.
How Often to Reseal
For shower grout: reseal every 1–2 years. For floor grout in high-traffic areas (kitchen, entryway): reseal annually. For low-traffic bathroom floor grout: every 2 years. The water-bead test tells you when it’s time: drip water onto the grout. If it beads up and wipes away, the sealer is still effective. If the water is absorbed immediately and darkens the grout, the sealer has worn down and it’s time to reapply.
Grout Maintenance Routine
Weekly
- Wipe down shower walls with a squeegee or towel after every shower to remove standing water and soap residue — this single habit dramatically reduces mold and soap scum buildup in grout.
- Spray shower grout with a diluted daily shower spray (or a 50/50 hydrogen peroxide/water mixture) and leave it — no rinsing needed. This keeps mold spores from establishing.
- Sweep or vacuum tiled floors before mopping so dirt doesn’t get pushed into grout lines during mopping.
Monthly
- Apply the baking soda/peroxide paste to shower grout and scrub lightly. This routine monthly treatment prevents deep staining from building up and significantly reduces the need for heavy cleaning.
- Mop tiled floors with a pH-neutral tile cleaner. Avoid acidic or vinegar-based floor cleaners if you have natural stone tile.
Annual
- Do a thorough grout cleaning with oxygen bleach (floors) or steam (all areas).
- Do the water-bead test to check sealer integrity. Reseal if water absorbs rather than beads.
- Inspect grout lines for cracking, crumbling, or persistent dark spots that don’t clean up — these may indicate areas that need regrout rather than cleaning.
When to Regrout Instead of Clean
Cleaning is only appropriate when the grout structure itself is sound. There are situations where cleaning is not the right answer:
- Crumbling or cracked grout: Grout that is physically crumbling, has visible cracks, or is falling out of the joints must be removed and replaced. Cleaning will not restore structural integrity, and cracked grout allows water to infiltrate behind tiles, leading to mold in the substrate and eventually loose or hollow tiles.
- Mold growing within the grout body (not just on the surface): Surface mold cleans off with peroxide or bleach treatment. But if grout has persistent dark discoloration that doesn’t respond to cleaning, and especially if there’s any sponginess or softness in the surrounding tiles, the mold may be in the setting material or substrate behind the tiles — a much more serious issue requiring professional assessment and potentially tile removal.
- Staining so deep it won’t respond to any cleaning: Some stains — particularly rust, permanent dye, or long-standing mold — have penetrated so deeply into porous grout that they’re part of the grout body. A grout pen (Method 4) is a practical cosmetic solution; complete regrout is the permanent solution.
Frequently Asked Questions
Can I use a power drill brush attachment on grout?
Yes, with the right type of brush. Nylon-bristle drill brush attachments (the soft, white or yellow bristle type) are safe and very effective on grout — they deliver high-speed scrubbing that would take hours by hand in minutes. Make sure to use only nylon bristle attachments, not wire or metal bristle types, which will damage both grout and tile. Medium-stiffness nylon drill brushes (pink or blue color on many brand lines) are the best choice for grout. Apply your cleaning paste or solution first, allow dwell time, then use the drill brush for the scrubbing step. Clean with a drill brush and you’ll dramatically reduce the time and physical effort required.
How long does grout sealer last?
A quality penetrating sealer applied in two coats to clean, dry grout typically lasts 1–3 years in actively used shower and floor areas. Penetrating sealers (also called impregnating sealers) outlast topical sealers because they’re inside the grout structure rather than on top of it. Factors that accelerate sealer wear include: heavy foot traffic, frequent wet exposure (showers used daily by multiple people), use of acidic cleaning products, and inadequate drying time before the initial application. Do the water-bead test annually to check whether resealing is needed rather than waiting for a fixed interval.
My grout is dark even after cleaning — is it mold?
It might be, but dark grout after cleaning is not always mold. There are three main possibilities. First, the grout may be permanently stained — the dark color is absorbed into the grout pores and will not clean out. A grout pen can cover this cosmetically. Second, the grout may still be damp — freshly cleaned grout always looks darker wet; assess the color only after the grout has dried completely for 24–48 hours. Third, if the dark areas specifically follow the grout lines (rather than patches on tile), appear fuzzy or have a slightly fuzzy texture under magnification, and persist even after drying, it is likely mold. Black or dark gray mold in shower grout specifically is common and treatable with hydrogen peroxide (let it sit 20–30 minutes). Persistent, deeply embedded mold that doesn’t respond to peroxide treatment should be evaluated by a tile professional, as it may indicate moisture intrusion behind the tile.
Is epoxy grout worth using for a new tile installation?
Epoxy grout is a completely different material from cement-based grout — it’s non-porous, highly stain-resistant, and does not require sealing. For bathroom floors, wet areas, and kitchen backsplashes where staining is a persistent problem, epoxy grout is an excellent choice and dramatically reduces long-term grout maintenance. It is significantly more expensive than cement grout (3–5x the cost of materials) and more difficult to install correctly (it sets faster and has a shorter working window), so it’s usually installed by professionals. If you’re doing a full regrout or new tile installation and grout maintenance has been a persistent frustration, epoxy grout is worth the investment.

Ava Harrington is a home improvement writer and DIY enthusiast with over eight years of hands-on experience maintaining, renovating, and documenting residential properties across the United States. She writes practical, no-fluff guides on home care, preventive maintenance, and everyday repairs — helping homeowners protect their properties without overspending or overcompleting.