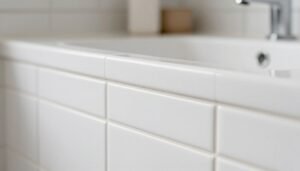
Old, cracked, or moldy caulk around a bathtub or shower is one of those problems that looks minor but causes serious damage over time. Water that sneaks behind the tile can rot the subfloor, feed mold inside the wall cavity, and eventually lead to repairs that cost thousands. The good news: recaulking is one of the most beginner-friendly home maintenance jobs there is. With the right prep, the right product, and about two hours of your time, you can get a clean, professional-looking seal that lasts for years — without calling a plumber or contractor.
When to Recaulk: Signs You Should Not Ignore
Caulk does not last forever. Most silicone and latex caulk in wet areas has a functional lifespan of 5 to 10 years, and it degrades faster in bathrooms with poor ventilation or heavy daily use. Here is how to tell it is time to redo it:
- Pink, black, or gray staining that does not scrub off. This is mold growing inside or beneath the caulk — not just surface grime. Cleaning it will not fix the underlying problem.
- Gaps or cracks along the bead. Even a hairline crack lets water behind the wall. Run your finger along the line — any separation from the tile or tub means it needs replacing.
- Caulk that has pulled away from the surface. This happens as the material ages and loses elasticity. Once it separates, it is no longer sealing anything.
- Soft or spongy texture. Press the caulk gently. It should feel firm and slightly flexible. If it compresses easily or feels slimy, it has broken down.
- Discoloration that looks yellowed or brownish. White caulk that has turned yellow is usually a sign of age, soap residue penetration, or early mold — all reasons to start fresh.
What You Will Need
You do not need a specialized toolkit for this job. Most of what you need costs under $20 total and is available at any hardware store.
- A caulk remover tool or utility knife (a plastic scraper works on acrylic tubs to avoid scratches)
- Needle-nose pliers for pulling stubborn strips
- Rubbing alcohol or denatured alcohol for cleaning the surface
- A mold-killing spray or diluted bleach solution (1 part bleach to 10 parts water)
- 100% silicone caulk labeled for kitchen and bath use — look for “mold and mildew resistant” on the label
- A caulk gun
- Painter’s tape (optional but highly recommended for clean lines)
- A small bowl of water and a few drops of dish soap for smoothing
- Paper towels or a clean rag
A note on caulk selection: For bathtubs and showers, always use 100% silicone — not latex, not “siliconized latex,” and not general-purpose caulk. Silicone is waterproof, stays flexible as the tub expands and contracts with temperature changes, and resists mold far better than latex alternatives. It is slightly harder to work with but dramatically more durable in wet environments.
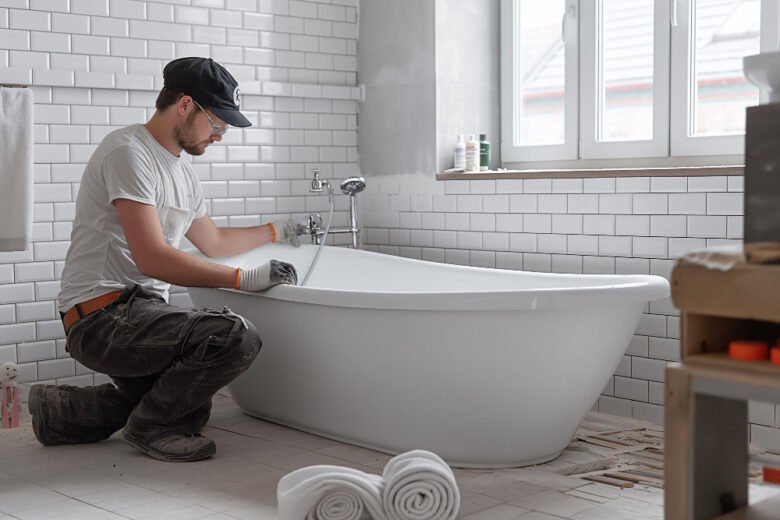
Step 1: Remove All the Old Caulk
This is the most important step — and the one most people rush. Applying new caulk over old caulk guarantees failure. The new layer will not bond properly, will peel within weeks, and will trap moisture between the two layers. You must get down to bare surface.
Start by scoring along both edges of the existing caulk with a utility knife or a dedicated caulk removal tool. Keep the blade as flat as possible to avoid scratching the tub surface. On acrylic or fiberglass tubs, use a plastic scraper instead of metal. Once scored, try to lift the caulk in one continuous strip — needle-nose pliers help grab the end and pull. It rarely comes off perfectly, so work in sections.
After removing the bulk of the old caulk, go back with the scraper and remove any remaining residue from the joint. Be thorough — even small bits of old caulk left behind will prevent the new bead from adhering flat. A utility knife held nearly parallel to the surface works well for scraping thin residue from tile edges.
Step 2: Clean, Dry, and Treat the Surface
Once the old caulk is out, spray the joint with your mold-killing solution and let it sit for 5 to 10 minutes. This kills any mold spores in the gap that would otherwise grow up through your new caulk. Wipe clean with a paper towel and let the area air dry completely.
Then wipe down both surfaces — the tub edge and the tile — with rubbing alcohol. This removes soap film, body oil, and cleaning product residue that would prevent adhesion. Do not skip this step: it is the difference between caulk that sticks for five years and caulk that peels in five months.
Critical: The surface must be completely dry before you apply new caulk. Give it at least an hour after cleaning, or use a hair dryer on a low setting to speed up the process. Silicone will not bond to damp surfaces.
Step 3: Apply Painter’s Tape for Clean Lines
This step is optional but makes a significant difference in the final appearance. Run a strip of painter’s tape along the tile, about 3 to 4 millimeters back from the edge of the joint. Run a second strip along the tub edge, the same distance back. The gap between the two strips of tape is where your caulk bead will sit.
The tape creates perfectly straight lines on both sides of the bead and catches any excess caulk before it smears across the tile. For first-timers especially, this technique turns a messy job into a clean one.
Step 4: Load and Cut the Caulk Tube
Load the tube into the caulk gun. Cut the tip of the tube at a 45-degree angle, starting with a very small opening — about 4 to 5 millimeters. You can always cut more off if you need a larger bead, but you cannot put material back into the tube. A smaller opening gives you more control. Pierce the inner foil seal with a nail or the puncture tool built into most caulk guns.
Practice a short test bead on a piece of cardboard or paper before you start on the tub. Get a feel for how fast the material flows and how quickly you need to move the gun to get an even line.
Step 5: Apply the Caulk Bead
Hold the gun at a 45-degree angle to the joint, with the tip pointing into the gap. Apply steady, even pressure on the trigger and move the gun at a consistent pace along the entire joint in one continuous motion. Moving too slowly creates a thick, uneven bead. Moving too fast leaves gaps. Aim for smooth and unhurried.
Work corner to corner without stopping. If you need to stop, do so at a corner — stopping mid-run creates a visible seam. Complete one wall at a time.
Step 6: Smooth the Bead
Immediately after applying the caulk — before it begins to skin over — smooth the bead with a wet finger. Dip your finger in the bowl of soapy water first: the dish soap acts as a lubricant and prevents the silicone from sticking to your skin. Draw your finger along the bead in one steady motion, pressing lightly to push the caulk into the joint and create a concave, smooth finish.
Wipe excess caulk off your finger onto a paper towel before each pass — dragging accumulated material back over the bead ruins the finish. Work one section at a time, smoothing as you go.
Step 7: Remove the Tape and Let It Cure
If you used painter’s tape, remove it immediately — before the caulk starts to set. Pull the tape back at a 45-degree angle, away from the bead, slowly and steadily. Waiting too long makes the tape difficult to remove cleanly and can pull the fresh bead with it.
Once the tape is off, do not touch the bead. Let the caulk cure completely before exposing it to water. Most 100% silicone products are touch-dry within 30 minutes but require a full 24 hours before getting wet. Some products specify 48 hours for full cure — check the label. Using the shower too early is one of the most common reasons new caulk fails prematurely.
How to Make Your New Caulk Last Longer
A fresh caulk job looks great — and with a few simple habits, it can stay that way for years.
- Ventilate the bathroom after every shower. Run the exhaust fan for at least 15 minutes after you finish, or crack the door and window. Persistent moisture is the primary cause of mold growth in caulk.
- Rinse the caulk line weekly. A quick rinse with the showerhead after your shower removes soap residue before it can penetrate and discolor the bead.
- Avoid abrasive scrubbers on the caulk line. Scrub pads roughen the surface of silicone, making it more porous and more susceptible to mold over time. A soft cloth or sponge is enough.
- Check the caulk annually. A quick visual inspection once a year catches small cracks or separation early — before water has a chance to sneak behind the wall. A small gap caught early takes 20 minutes to fix; the damage from ignoring it can take days and thousands of dollars to repair.
Common Mistakes and How to Avoid Them
Applying new caulk over old caulk. This is the single most common mistake. No matter how clean the existing caulk looks, remove it entirely before applying new material. New caulk bonds to the tub and tile — not to old caulk.
Skipping the drying time. Silicone will not adhere to a wet surface. Even if the surface looks dry to the eye, residual moisture in grout lines or tile edges can prevent proper bonding. When in doubt, wait an extra hour.
Using the wrong product. General-purpose caulk, window caulk, and exterior caulk are not designed for the constant wet-dry cycle of a bathroom. Always use a product labeled specifically for kitchen and bath use with mold and mildew resistance.
Cutting the tube tip too wide. A large opening makes the bead hard to control and almost impossible to smooth neatly. Start small — you can always trim more off the tip if needed.
Using the shower too soon. 24 hours is the minimum. 48 is better. Getting the caulk wet before it has fully cured is a guaranteed way to ruin the job.
FAQ
How long does recaulking a tub actually take?
Plan for about 90 minutes of active work spread over two sessions: 30 to 45 minutes to remove the old caulk and clean the surface, then a waiting period of at least one hour for the surface to dry, followed by 20 to 30 minutes for application and smoothing. Add the 24-hour cure period and you are looking at a two-day project in terms of elapsed time — but very little of that is actual work.
Can I caulk over black mold?
No. Caulking over mold traps it in place and feeds it a dark, damp environment to keep growing. Remove all the old caulk, treat the surface with a mold-killing product, let it dry completely, and confirm the mold is gone before applying new material. If the mold extends into the grout or behind the tile, that is a more serious problem that may require a professional assessment.
My caulk is already peeling after a few months. What went wrong?
Early peeling almost always comes down to one of three causes: the surface was not completely dry when the caulk was applied, the old caulk was not fully removed, or the wrong product was used. Check all three before reapplying. If the surface preparation is correct and the right product is used, a silicone bead in a bathroom should last at least five years.
Is there a way to remove silicone caulk residue that is hard to scrape off?
Yes. Commercial caulk remover softeners — available at most hardware stores — break down silicone and make it much easier to scrape away. Apply the product, let it sit for the time specified on the label (usually 2 to 3 hours), and then the residue should peel or scrape off with minimal effort. Rubbing alcohol also helps loosen thin silicone residue on smooth surfaces.
Final Thoughts
Recaulking a bathtub or shower is one of those maintenance jobs that pays back far more than the effort it costs. A couple of hours of careful work protects your walls, your floor, and your home’s structure from water damage that can be genuinely expensive to fix later. And unlike many repairs, it is entirely beginner-friendly — no special skills, no expensive tools, just patience and the right preparation.
If you found this guide useful, take a look at our other practical repair tutorials in the Smart Maintenance Hacks category — including how to fix a slow drain without harsh chemicals and the right way to touch up wall paint so it actually matches.

Ava Harrington is a home improvement writer and DIY enthusiast with over eight years of hands-on experience maintaining, renovating, and documenting residential properties across the United States. She writes practical, no-fluff guides on home care, preventive maintenance, and everyday repairs — helping homeowners protect their properties without overspending or overcompleting.