You’ve touched up a scuff on the wall. You stepped back, and now there’s a glaring bright patch that looks worse than the original mark. Welcome to one of the most common and frustrating home maintenance experiences — the paint touch-up that doesn’t match.
The good news is that this failure is almost always caused by a predictable, fixable set of mistakes. When you understand why touch-ups go wrong, you can avoid every one of those traps. This guide walks you through the complete process — from finding your original color, to matching sheen, texture, and applying the feathering technique that makes a patch truly disappear.
Why Paint Touch-Ups So Often Look Worse Than the Damage
Before getting into the how, it’s worth understanding the why — because the failures are systematic and predictable.
Sheen Mismatch
Sheen (the gloss level of a paint finish) is actually more visible to the human eye than color variation. A patch painted in eggshell applied to a satin wall will be immediately obvious from across the room, even if the color is a perfect match, because the two sheens reflect light differently. This is the most overlooked factor in touch-up failures.
Color Drift Over Time
Wall paint changes color as it ages. Exposure to light (especially UV), smoke, cooking vapors, and the simple chemistry of oxidation causes existing wall paint to shift — usually yellowing or lightening slightly over years. Even if you saved a can of the exact original paint, after several years it may no longer match what’s on the wall. Fresh paint also dries very slightly different from the same paint after it’s cured for months on a wall.
Texture Difference
Many walls have a textured finish — orange peel, knockdown, skip trowel — applied before painting. If the repair area was skimmed smooth (for example, after a drywall patch), and you paint over a smooth area surrounded by textured wall, the difference is clearly visible even with a perfect color match.
Hard Edges from Small Patches
When you paint a small patch with a cut-in brush and stop at a defined edge, that edge is usually visible after drying. The dry brush/roller technique called feathering solves this — but most homeowners don’t know it exists.
Step 1: Find or Recreate the Original Color
Your first goal is to get paint that matches the existing wall — not just the original formula, but the wall as it looks today.
If You Have Leftover Paint
Check the lid and bottom of any saved cans for the original color formula label (most paint stores print the formula on the lid). Even if you have the original paint, do a small test patch in an inconspicuous area first and let it dry completely — if the wall has drifted noticeably from the original, you’ll see it. If the drift is significant, you’ll need to either do a full wall repaint or have the formula tweaked to match the current wall color.
If You Don’t Have Leftover Paint
Cut a small paint chip from an inconspicuous area — inside a closet, behind a door, or from a wall section that will be covered by furniture. The chip should be at least 1.5 inches square for accurate color scanning. Take it to a paint store (Benjamin Moore, Sherwin-Williams, Home Depot, etc.) and have them scan it with their spectrophotometer color-matching device. Modern color-match scanners are remarkably accurate, reading the light reflectance of your chip and generating a custom formula that replicates that exact color, regardless of the original brand.
Benjamin Moore’s Color Portfolio app, Sherwin-Williams’ ColorSnap, and similar tools also allow you to scan a photo taken under good natural lighting — though in-person chip matching with a physical sample is always more accurate than phone photo matching.
Do a Patch Test Before Committing
Even with a color-matched formula, apply a small test area about 4 inches square, let it dry fully (minimum 2 hours, ideally 24 hours for true color), and assess it in multiple lighting conditions before touching up the real damage. Color-matched paint is not always a perfect match — it may need one or two formula adjustments before it’s right.
Step 2: Match the Sheen Level
This step is non-negotiable. You must use the same sheen as the existing wall paint — not approximately the same, but exactly the same category.
- Flat/Matte: No gloss. Hides surface imperfections well. Common on ceilings and low-traffic bedroom walls. Least durable and hardest to clean.
- Eggshell: Very slight sheen, resembles the surface of an eggshell. The most popular finish for living rooms and bedrooms. Washable.
- Satin: Noticeable soft sheen. Common in hallways, kitchens, and children’s rooms. More durable and washable than eggshell.
- Semi-gloss: Clear, noticeable gloss. Standard for trim, doors, and kitchen/bathroom walls. Very durable and moisture-resistant.
- High-gloss: Maximum reflectivity. Used primarily on trim in high-end applications.
If you’re uncertain what sheen your walls are, compare them to paint samples at the store under light. Flat finish shows no light reflection even at a raking angle; eggshell shows very slight reflection; satin has a visible soft glow; semi-gloss clearly reflects light. When you buy touch-up paint matched to your wall color, specify the sheen level explicitly — color match labs will ask for this, but confirm it.
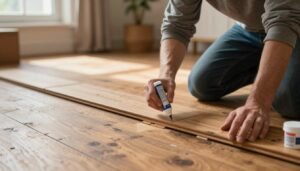
Step 3: Match the Texture
If your repair area has been skimmed smooth but the surrounding wall is textured, you need to recreate the texture before painting.
Common Wall Textures and How to Match Them
- Orange peel: A fine, bumpy texture resembling orange skin. Recreate with an aerosol orange-peel texture spray, applied at the distance specified on the can (typically 18–24 inches). Practice on cardboard to dial in the spray distance before applying to the wall.
- Knockdown: A flatter, irregular pattern with slightly raised areas that have been “knocked down” with a drywall knife. Apply a thin coat of joint compound with a roller, allow to partially set for 10–15 minutes, then lightly drag a wide drywall knife over the surface to flatten the high points. This takes practice — do a small test area first.
- Skip trowel: A more artisan-looking irregular texture. Applied by hand with a trowel using random strokes. Difficult to perfectly replicate on a small area without practice.
- Smooth walls: If your walls are smooth (common in newer construction), no texture recreation is needed — just ensure the repaired drywall area is properly sanded flush and primed.
Step 4: Prepare the Surface
Proper surface prep is what separates a visible patch from an invisible one. Skipping preparation is the most common reason touch-ups fail to adhere or match properly.
- Clean the area: Wash the repair area and the surrounding 6–8 inches with a damp cloth. Grease, dust, or any contaminant on the surface will prevent proper paint adhesion and can affect the final appearance. For kitchen walls, a diluted dish soap solution removes grease effectively. Let dry completely before continuing.
- Sand any raised areas: If the original damage left a raised edge — from dried paint ridges, a small ding, or a previous patch — sand it lightly with 120–150 grit sandpaper until smooth and flush with the surrounding surface. Feather the edges of any existing paint ridges.
- Prime when necessary: Primer is essential when: (a) you’re painting over bare drywall or a fresh drywall joint compound patch, (b) you’re covering a significant stain (water stain, crayon, marker), or (c) you’re changing from a dark to a light color. For most minor scuffs and small repairs on a painted wall, primer is optional but recommended — it creates a consistent base that helps the touch-up color match more closely. Use a shellac-based primer for stain blocking; use a PVA drywall primer for new drywall patches.
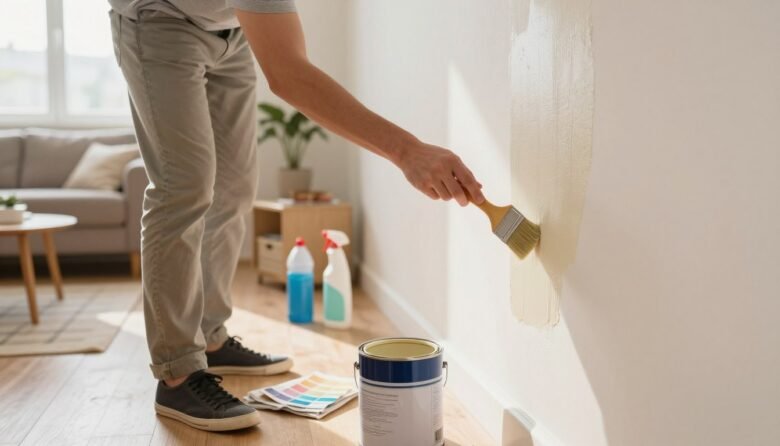
Step 5: The Feathering Technique
Feathering is the technique that makes a touch-up patch invisible. Rather than painting a defined-edge patch and stopping, feathering gradually blends the new paint into the surrounding area so there is no visible transition line.
How to Feather a Touch-Up Patch
- Load a small roller (4-inch foam roller works best for touch-ups — it applies paint more evenly than a brush and avoids obvious brush strokes) with a very light amount of touch-up paint. Do not overload the roller.
- Apply paint to the damaged area with light, even strokes to cover the repair completely.
- Without reloading the roller, begin extending your strokes out from the repair in all directions — 3 to 6 inches beyond the actual repair area. As the roller runs out of paint, the coverage becomes thinner and lighter toward the edges.
- These thinning, overlapping strokes create a gradual transition rather than a hard edge. The goal is that the outer boundary of your touch-up is essentially invisible because it fades into the existing paint rather than stopping abruptly.
- Let the first coat dry completely before assessing. Do not assess wet paint — the color will shift as it dries. At minimum, wait 2 hours; ideally 4 hours before evaluating.
- If a second coat is needed, feather each subsequent coat slightly further out than the previous one, continuing to blend.
Step 6: Tipping Off — The Final Stroke
Tipping off is a painter’s technique borrowed from furniture finishing. After applying the final coat with a roller, you use a dry, high-quality brush to make a single series of very light, unloaded strokes in one consistent direction across the wet paint surface.
This technique levels any stipple marks left by the roller foam, creates a smooth and consistent surface texture, and reduces the visibility of lap marks. Use a soft-bristled 3-inch brush. Load no paint onto it. Hold it at a very low angle (almost flat) and draw it lightly across the freshly rolled surface in smooth, parallel strokes. Work quickly — this must be done while the paint is still wet.
Step 7: Let Dry and Assess in Different Lighting
This is perhaps the most important step that homeowners skip. Paint looks dramatically different in different light conditions, and a touch-up that looks invisible in warm artificial light may be glaringly obvious in bright natural daylight — or vice versa.
After the final coat has dried for at least 4 hours (ideally overnight), assess the patch under several conditions:
- Natural daylight from the window at the angle it typically illuminates that wall
- Overhead artificial light (as it appears in normal evening use)
- A raking light — hold a flashlight or lamp at a very low, oblique angle to the wall surface. This reveals any texture differences, sheen mismatches, or edge lines that aren’t visible under flat lighting.
If the patch is still visible after proper feathering and sheen matching, and you’ve done everything correctly, you may be dealing with age-related color drift — which brings us to the honest conversation about limits.
When Color Drift Makes a Full Match Impossible
If your walls have aged significantly — more than 5–7 years since painting, or in a sunny room, or with any smoke or cooking exposure — the existing paint has likely drifted enough from its original color that no touch-up, however skillfully executed, will be truly invisible at close inspection.
In this situation, you have three realistic options:
- Accept an imperfect but improved result. The touch-up may be visible up close but much less noticeable than the original damage. This is often acceptable for a small repair in a low-visibility location.
- Paint a full wall section. Painting from corner to corner — or from one architectural break to another (an inside corner, a door frame, a window frame) — eliminates the visible boundary between old and new paint and creates a complete visual reset for that surface. This is the most practical solution for significant repairs on aged walls.
- Repaint the entire room. If walls are heavily aged or you have multiple repair areas, this is often the most cost-effective and visually satisfying solution. A gallon of quality interior paint covers approximately 350–400 square feet and costs $35–$75. A full room repaint is also an opportunity to update the color and refresh the entire space.
Common Touch-Up Mistakes to Avoid
- Applying paint too thickly in one coat. Multiple thin coats always produce better results than one heavy coat. Thick applications sag, take much longer to dry, and show texture inconsistencies more clearly.
- Not allowing sufficient dry time between coats. Applying a second coat over a coat that isn’t fully dry results in lifting, streaking, and poor adhesion. Follow the paint label’s recommended recoat time — typically 2–4 hours for latex paints.
- Using the wrong roller nap. For smooth to lightly textured walls, use a 3/8-inch nap foam or microfiber roller. A thicker nap (1/2 inch or more) creates too much stipple texture on smooth surfaces.
- Using a brush for the main patch area. Brushes leave visible stroke marks in most sheens. A small foam roller produces a much smoother, more wall-like finish. Use a brush only for tipping off and for cutting in very small, tight areas where a roller won’t fit.
- Painting directly over a shiny or glossy surface without scuffing. If the damaged area has a semi-gloss or gloss finish and you’re applying new paint directly over it, lightly sand it with 220-grit sandpaper first to provide tooth for adhesion.
Frequently Asked Questions
My paint chip is old and faded — can the store still match it?
Yes, but with a caveat: the spectrophotometer reads the chip as it exists today — so if the chip itself has faded or yellowed, the match will reflect that faded color, not the original formula. In practice, this is often exactly what you want, because the chip that has faded alongside your wall will usually be a closer match to your current wall color than the original formula would be. If you have access to the original formula label from a saved paint can, bring both the chip and the formula label and let the store help you decide which is the better reference.
My touch-up dried noticeably darker than the wall — why?
This is almost always one of three things. First, you may have applied too thick a coat — heavy applications of paint dry darker than thin, properly tipped-off coats. Second, if you used a primer first, and the primer absorbed unevenly, the final coat may appear darker over the primed area. Third, latex paint always dries slightly different than it looks wet, and a fresh coat generally looks slightly richer than aged wall paint — this is a color drift issue. If the touch-up is still darker after 24 hours of drying, lightly feather the edges with a very thin coat of slightly lighter paint, or consider painting the full wall section.
How long should I wait before touching up freshly painted walls?
For newly painted walls, wait at least 30 days before doing any touch-up work. Fresh latex paint continues to cure (harden and stabilize its chemistry) for 2–4 weeks after it appears dry to the touch. Touching up within the first week often results in visible patches because the fresh paint underneath is still off-gassing and its surface chemistry is unstable. After 30 days, fresh touch-up paint bonds and blends much more naturally with the original coat.
Can I use a paint touch-up pen or marker instead of brush and roller?
Touch-up pens are convenient for very small scuffs and marks — think pencil-eraser-sized repairs. For anything larger than about half an inch, a pen application will be visible because it lacks the feathering ability of a roller. The color-filled tip also tends to deposit paint in a more saturated, less translucent layer than a rolled coat, making sheen mismatches more obvious. Use pens only for the smallest repairs where a roller would be impractical.
Does the brand of touch-up paint matter if I get a color match done?
To some degree, yes. Different paint manufacturers formulate their bases differently, which can affect how the color reads, the sheen characteristics, and how the paint cures. If you know the original paint brand (from a saved can or a receipt), try to use the same brand for touch-ups. If you can’t identify the original brand, use a premium-grade interior paint for the match — cheap paints often have lower pigment concentration and may not achieve a true color match even with an accurate formula. Benjamin Moore Regal Select, Sherwin-Williams Emerald, and Behr Marquee are all reliable choices for touch-up work.

Ava Harrington is a home improvement writer and DIY enthusiast with over eight years of hands-on experience maintaining, renovating, and documenting residential properties across the United States. She writes practical, no-fluff guides on home care, preventive maintenance, and everyday repairs — helping homeowners protect their properties without overspending or overcompleting.