Flushing your water heater is a simple care step that pays off in big ways. Regular tank flushing removes sediment that saps efficiency and clogs lines. That one task can add up to five extra years to your unit’s life.
When you flush the tank annually, your system uses less energy and delivers cleaner hot water. You also catch small problems early, which keeps repairs small and bills lower.
Good routine checks improve safety by reducing risks tied to electrical or gas parts. They protect your investment and help your family count on steady performance day after day.
Understanding the Importance of Water Heater Maintenance
Routine care keeps a home hot-water system running longer and cheaper to operate. Preventive checks stop small faults from becoming costly failures and keep performance steady year-round.
When your unit runs at peak efficiency, it uses less energy and trims monthly bills. Flushing sediment and battling corrosion also improves the taste and quality of the water your family uses.
- Inspect the cold inlet, T&P relief valve, and anode rod on a schedule.
- Catch thermostat and wiring issues early to avoid breakdowns.
- Hire a licensed pro for gas or electrical work you do not trust.
Consistent care across all heaters in the home prevents surprise repairs and extends service life. A small time investment now will keep hot supply reliable and costs lower later.
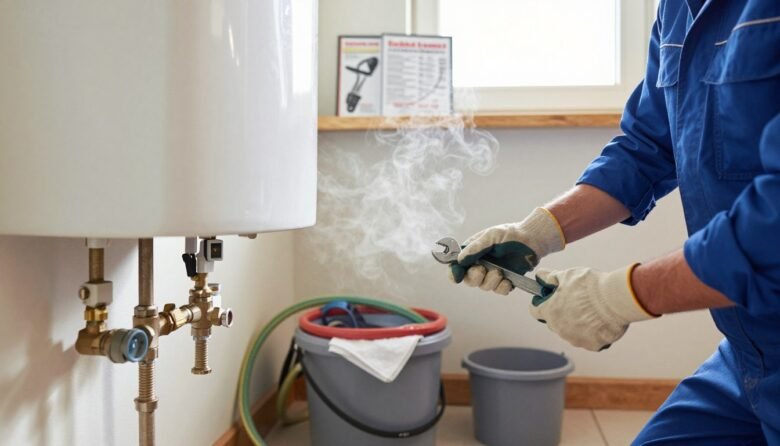
Essential Tools and Safety Gear
Before you open any valves, gather the right tools and protective gear so the job stays safe and fast.
Required Tools
Have these items on hand: a garden hose, bucket, screwdriver, and an adjustable wrench.
Keep a pipe wrench ready if you plan to replace the anode rod or loosen fittings.
- Garden hose for the tank drain
- Bucket to catch runoff
- Adjustable and pipe wrenches plus a screwdriver
- Replacement anode rod if inspection shows heavy corrosion
Safety Precautions
Always wear gloves and goggles to protect skin and eyes from hot liquid and debris.
For electric water heaters, switch off the circuit breaker. For gas water units, set the gas valve to pilot and ventilate the area.
Shut off the cold supply valve and wait several hours after power-off so the tank cools. When you finish, make sure the tank is full of water before restoring power to avoid damaging heating elements.
Identifying Signs Your Unit Needs Attention
A few simple clues can tell you when your unit needs professional attention. Spotting problems early saves money and extends service life.
If rusty water appears at your tap, it may signal internal corrosion in the tank or the connecting pipes. Check several faucets to see if the discoloration is widespread.
Visible corrosion on the tank exterior is a serious warning. Surface rust often means hidden damage that deserves a prompt inspection.
Inconsistent hot temperature usually points to a failing element or thermostat. Strange rumbling or popping noises indicate sediment buildup in the tank.
- Reduced hot supply can mean the unit needs service or replacement.
- Odd smells or discolored output warrant immediate attention.
- Regular checks and simple water heater maintenance help catch these issues early.
Watch for these signs on all heaters in your home. Acting fast helps prevent leaks and limits repair costs.
How to Flush Your Water Heater and Add Years to Its Life
Removing built-up sediment from your tank restores efficiency and steadies performance. Follow a clear, safe sequence to flush the tank and protect components like the anode rod and relief valve.
Sediment Removal Process
First, turn off electricity or gas and shut the cold water supply to the unit. Open a hot faucet inside the house to relieve pressure before you touch the drain valve.
- Attach a garden hose to the drain valve at the bottom of the tank and place the hose drain where hot liquid can run away safely.
- Open the drain and let the tank drain completely into a bucket or safe area. When empty, briefly open the cold water supply to stir loose remaining sediment and repeat until the outflow runs clear.
- Close the drain valve, remove the hose, and refill the tank by turning on the cold supply and opening all faucets until steady hot water returns.
Never turn power or gas back on until the tank is full. The flushing process cuts clogs, improves energy use, and helps your heaters last longer. Take care—hose drain output can be scalding hot.
Testing the Temperature and Pressure Relief Valve
A functioning temperature and pressure relief valve is your heater’s last line of defense against dangerous overpressure.
The T&P valve releases excess pressure and temperature from the tank. Test it once a year to keep your system safe.
- Place a bucket under the discharge pipe to catch released hot water.
- Lift the trip lever on the valve to let a short burst of flow run into the bucket.
- Release the lever; the flow should stop. If no water appears, or if the valve keeps running, replace the relief valve immediately.
If replacement is needed, shut off the cold water supply and drain the tank before unscrewing the old valve with a pipe wrench.
Always use caution—hot water from the valve can burn. If you are unsure about any step, call a licensed pro to handle the T&P valve safely and keep your tank and family protected.
Inspecting and Replacing the Sacrificial Anode Rod
Inspecting the anode rod prevents costly corrosion long before leaks start. The anode attracts corrosive elements so the tank metal stays protected.
Turn off power or gas and shut the cold water supply. Open a nearby faucet and drain a few gallons from the tank using the drain valve to lower pressure.
Use a 1-1/16-inch deep socket and an electric impact wrench to remove the anode rod from the top of the tank. A good rod will be smooth and about a half-inch in diameter.
- Replace the rod if it is under 1/2″ thick or shows exposed core wire.
- Install the new anode and wrap the threads with Teflon tape for a leak-free fit.
- Refill the tank, run a faucet to purge air, and make sure the unit is completely full before restoring power.
Check the rod every five years as part of routine maintenance. A fresh anode costs far less than a new tank and protects your investment for years.
Adjusting Thermostat Settings for Efficiency
A small change to the thermostat can cut bills and keep your hot supply safer.
Set the unit to 120 degrees Fahrenheit for the best mix of safety and energy savings. That temperature reduces the risk of burns while limiting bacterial growth inside the tank.
For every 10 degrees you lower the dial, expect up to about 5% in energy savings. If you plan to be away for more than three days, drop the setting to its lowest safe level to save more.
- Turn off power (or set gas to pilot) before you start.
- Remove the access panel with a screwdriver and find the temperature dial on the thermostat.
- Adjust slowly, then replace the panel securely to protect wiring and internal parts.
- Watch for scalding risks when testing the valve and faucets after changing settings.
Simple, regular checks of the thermostat keep a water heater efficient and safe. Proper settings help your system run longer and cost less to operate.
Insulating Pipes and the Tank
Simple insulation upgrades can stop heat from escaping and save you real money each year. A modest investment in wraps and a blanket reduces standby loss and helps your system run more efficiently.
Pipe Insulation Techniques
Measure exposed pipes before you buy sleeves. Foam pipe sleeves fit most runs and cut loss as hot water travels to taps.
Near the flue of gas units, swap foam for heat-resistant fiberglass wrap. That prevents melting and keeps the installation safe.
Tank Blanket Installation
An insulation blanket can reduce standby heat loss by 25%–45%. Cut openings for valves and controls so everything stays accessible.
- Secure the blanket with foil tape, but leave the top of gas or oil models uncovered.
- Never block controls, vents, or the T&P valve when wrapping the tank.
- Proper insulation can shave up to about 9% off annual hot water costs.
By insulating both the tank and pipes you help your heaters deliver steadier performance. These upgrades are inexpensive and pay back over time.
Lighting the Pilot for Gas Models
Use care when relighting the pilot on a gas water heater. Follow the manufacturer’s manual and work in a calm, well-ventilated area.
With the gas valve in the “on” position, set the control knob to “pilot.” Press and hold the knob, then push the igniter button until you see the pilot flame through the sight glass.
Newer units often have a small pilot that is hard to see. If so, darken the room to confirm the flame.
- Turn the gas valve to “pilot” and press the control knob.
- Hold the knob down while you push the igniter and watch the sight glass for the flame.
- After the pilot stays lit, set the thermostat to 120 degrees Fahrenheit for safe, efficient operation.
- If the pilot will not remain lit, suspect a faulty gas valve or thermocouple and call a licensed technician.
These steps keep your gas unit reliable and ready to supply hot water without surprises. Always prioritize safety and consult your manual for model-specific guidance.
Preparing Electric Units for Power
Before you reapply power, check that the tank is full and any trapped air has cleared from the lines.
The most common problem with electric water heater models occurs when someone energizes the unit too soon. If the tank is not full, the upper element can burn out immediately.
Open a hot faucet and let water run for at least three minutes. This purges air and ensures cold water has filled the top of the tank.
When you are certain the tank is full and air is removed, it is safe to turn the power back on. Wait up to two hours for the first full supply of hot water.
- Make sure the tank is completely full before connecting power to electric water heaters.
- If you still lack hot water after two hours, check the unit’s voltage on the label.
- Replacing a burnt element requires draining the tank and an element wrench; it is labor-intensive.
- For repeated power or wiring faults, contact a licensed electrician to inspect the connections.
Troubleshooting Common Performance Issues
A few quick troubleshooting steps will often restore steady hot supply and avoid costly fixes. Start with basic checks before calling a technician; many problems have simple fixes you can handle safely.
Inconsistent Hot Water
If your hot water swings from too hot to barely warm, inspect the thermostat and heating elements first. On electric water heaters, a failed element or misset thermostat is a frequent cause.
Check the temperature dial, then test each element if you have basic multimeter skills. If readings are off, replacement will restore steady temperature.
Strange Noises
Popping, rumbling, or knocking usually points to sediment buildup on the tank bottom. Sediment reduces efficiency and causes noise when trapped steam forms under deposits.
Flushing the tank and using a garden hose to rinse the drain until clear often solves the problem and cuts future sediment issues.
Leaks and Drips
Track leaks to their source: loose water supply fittings, a failing drain valve, or a cracked tank. Tighten connections and replace a leaking drain valve promptly.
Drips from the T&P valve or its discharge pipe can mean your system needs a thermal expansion tank. Rusty output may indicate internal corrosion or a spent anode rod that needs replacement.
- Check the drain valve and hose drain for proper operation.
- Test the pressure relief or T&P valve if you see persistent drips.
- When unsure, consult a pro to avoid damage or unsafe repairs.
Conclusion
A few careful steps each year will stretch the life of your appliance and cut bills. Keep a steady supply of hot water by following a simple checklist and staying consistent.
Focus on core tasks: flush tank when needed, inspect the anode rod, and operate the drain valve to clear sediment. Test the T&P valve and check the thermostat to protect performance and safety.
Good water heater maintenance pays off in lower energy use and fewer repairs. If a task feels risky, call a licensed pro. Start a routine now and enjoy reliable, efficient heat for years to come.

Ava Harrington is a home improvement writer and DIY enthusiast with over eight years of hands-on experience maintaining, renovating, and documenting residential properties across the United States. She writes practical, no-fluff guides on home care, preventive maintenance, and everyday repairs — helping homeowners protect their properties without overspending or overcompleting.