Keeping a clean, dry space helps protect your home from hidden damage. Re-caulk every year to stop leaks that let mold and mildew gain a foothold. Acting in time prevents costly repairs and keeps surfaces looking fresh.
Watch for peeling or cracking along the seal around your shower and tub. Small breaks let water reach walls and framing, so remove old caulk and replace it when you see gaps. Proper caulking creates a tight seal against water and extends the life of your fixtures.
Regular upkeep is simple and effective. By inspecting seals yearly and addressing wear early, you protect grout, tile, and wood from long-term water damage. This routine keeps mold growth low and your home healthier.
Why Regular Maintenance Matters for Your Bathroom
Simple, regular checks keep moisture from turning a small problem into a big repair. Inspecting seals and replacing worn caulk on schedule stops water from reaching framing and insulation.
Consistent upkeep prevents mold and mildew build-up and lowers the risk of hidden leaks. In older homes, worn joints can need professional-grade caulking to protect surfaces and structure.
- Catch failing seal edges early to avoid rot in walls and floors.
- Keep your shower and tub area dry to reduce bacteria and stains.
- Routine checks save time and money compared with major repairs later.
Good care of fixtures keeps your home healthier and extends the life of grout and trim. Follow basic tips like scheduling yearly inspections and replacing caulk when gaps appear. Staying proactive keeps your tub watertight and your space safe.
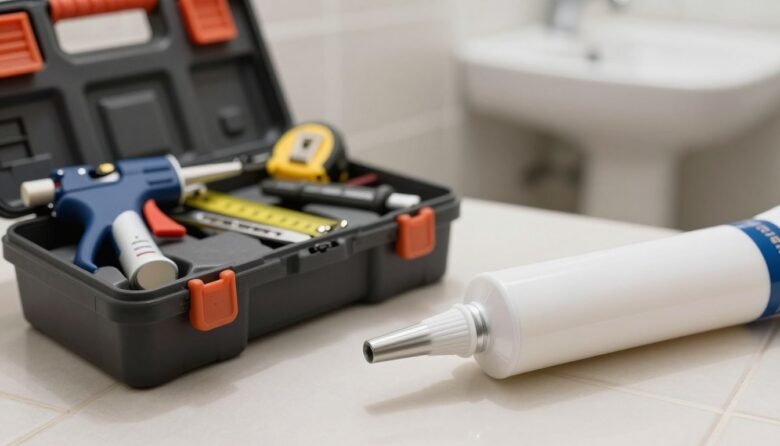
Essential Tools and Supplies for Your Project
Gathering the right tools before you start makes the whole job faster and neater. A short kit of quality items helps you work cleanly and reduces the chance of mistakes.
Must-Have Items
Bring a sharp utility knife, disposable nitrile gloves, scissors, and painter tape. Choose a silicone or latex caulk labeled for shower and bathroom use so it resists mold and holds up in wet areas.
Optional Professional Tools
For tougher jobs, a caulk gun and a reliable putty knife make applying and removing material easier. A ripping chisel or bush hammer is useful when old material is stubborn.
- Keep a caulk tube and a sharp knife ready to speed the process.
- Use painter tape to mask edges and get a straight bead.
- An electric sander helps when surfaces need smoothing before sealing.
Selecting the Right Caulk for Your Shower
Choosing the right sealant makes the difference between a lasting repair and a return job. Match product features to your project needs before you open the tube.
GE Momentive Performance Advanced Silicone Sealant offers up to seven years of protection, ideal for high-use areas. If you want a quick set, Gorilla Clear 100% Sealant dries in about 30 minutes and resists mold well.
Sashco 13010 Clear Adhesive works on wet surfaces and in wide temperature swings. Red Devil 0405 Siliconized Acrylic gives a paintable, high-gloss finish for trim near the tub.
- DAP Kwik Seal Plus is an affordable, paintable, waterproof choice for most jobs.
- Check the caulk use label on each tube to confirm it’s rated for kitchen and shower environments.
- Pick silicone for long-lasting water resistance, or a siliconized acrylic when you need paintability.
How to Remove Old Caulk Effectively
A steady hand and the right tools make removing old caulk quick and safe. Work slowly at a low angle with a sharp utility knife or razor scraper to avoid surface damage. Softening stubborn residue first saves time and limits scratches.
Handling Stubborn Residue
Apply a commercial remover like Goo Gone Caulk Remover to soften hard beads. Let it sit per the label, then use a Hyde’s 1-1/2” putty knife to scrape away the softened material from the tub edge and shower joints.
- Use a sharp knife to cut the bead in short passes; keep the blade low to the surface.
- Make sure to remove all traces of mold and mildew from the gaps before you seal to prevent future damage.
- If mold hides deep in narrow gaps, use a caulk gun to apply remover down the seam, then scrape again.
- Take your time—rushing causes scratches to tile and trim and can lengthen the process.
- When the old caulk is gone, wipe the area with rubbing alcohol so silicone or latex will bond cleanly.
Preparing the Surface for a Watertight Seal
A dry, dust-free surface is the single best start for a lasting waterproof seal. Make sure the area is completely dry before you apply new caulk because moisture keeps the sealant from bonding to the wall or tub.
Remove old caulk fully with a sharp knife and a putty knife. Scrape until no residue remains to avoid trapping mold under the new bead.
Cut the caulk tube tip at a 45-degree angle for a controlled flow. Use painter tape on both sides of the joint to guide a straight bead and keep adjacent surfaces clean.
- Fill gaps wider than 1/4″ with a backer rod so the sealant can sit correctly.
- Work in a steady, continuous motion when applying caulk to get a smooth bead.
- Keep a clean knife and a damp rag nearby to fix small errors quickly and prevent damage to tile or trim.
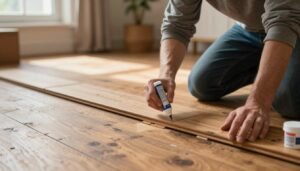
Expert Caulking Bathroom Tips for a Professional Finish
Proper angle and timing help the sealant lay into gaps and bond without bubbles. Use steady motion and a calm pace to keep the bead straight and full.
Mastering the Caulk Gun
Load the caulk tube into the gun and hold at a 45-degree angle to the joint. Keep steady pressure on the trigger while you move the gun at a consistent speed.
Applying the Bead
Cut the caulk tube tip at a 45-degree angle and start with a smooth, continuous bead. Aim to fill the opening completely so water cannot reach framing or tile edges.
Tooling for Smoothness
Tool the bead right away by running a wet finger along the line to compress and shape it. Remove painter tape while the seal is still wet to avoid lifting the new seal.
- Allow at least 24 hours for cure before using the shower or tub.
- If you must remove old caulk, clean the area and dry it before applying new material.
- Use silicone in wet areas for long life and resistance to mold and mildew.
Keeping Your New Seal Mildew Free
A quick wipe and proper airflow extend the life of a new seal. Clean the fresh caulk gently with a non-abrasive, mildew-resistant cleaner to avoid damage.
Use a soft-bristle brush or an old toothbrush to reach tight gaps near the tub and around trim. Rinse, then dry the area completely so standing water does not invite mold or mildew.
- Dry the shower area after each use to stop water from pooling in seams.
- Choose a silicone formula when selecting the type caulk; silicone resists bacteria and mildew better in a humid area.
- If you spot cracking or peeling, repair small gaps right away to protect the home structure behind the tub.
- Use non-abrasive cleaners and avoid harsh tools that can wear down the seal or tube finish.
Let the seal cure for at least 24 hours, then keep the bathroom ventilated to help the material maintain its strength over time. Small, steady care makes your work last and keeps mold growth low.
Conclusion
Taking the time to finish the seal properly pays off with long-lasting protection and fewer repairs. This small home job prevents water damage and keeps mold from gaining ground.
Work slowly with the tube and remove old material fully before you apply new caulk. Tool the bead carefully and let it cure so the seal bonds well.
Clean and ventilate the area after the job to extend the life of the seal. With patience and the right approach, you’ll get best results and real peace of mind for your bathroom space.

Ava Harrington is a home improvement writer and DIY enthusiast with over eight years of hands-on experience maintaining, renovating, and documenting residential properties across the United States. She writes practical, no-fluff guides on home care, preventive maintenance, and everyday repairs — helping homeowners protect their properties without overspending or overcompleting.