Your home’s comfort and performance depend on creating a tight barrier against outdoor elements. Small openings around entry points can significantly impact your indoor environment.
According to the U.S. Department of Energy, addressing these openings can reduce heating and cooling costs by more than 20%. This makes proper sealing one of the most effective home improvements.
The right materials and techniques create a comfortable living space while lowering monthly expenses. This guide will explore practical solutions for achieving optimal performance.
Key Takeaways
- Proper sealing around entry points can reduce heating and cooling expenses by over 20%
- Small gaps significantly impact indoor comfort and temperature control
- Addressing these openings improves overall home efficiency
- Effective solutions create a more comfortable living environment
- Simple improvements can lead to substantial monthly savings
- Choosing the right materials ensures long-lasting results
- Professional techniques deliver optimal performance and durability
Understanding the Critical Role of Door Insulation, Sealing Fixes, and Energy Savings
The battle for temperature consistency begins at your home’s entry points where air infiltration occurs. These openings allow outside air to enter while letting conditioned air escape.
This constant exchange forces your climate control systems to work harder. Addressing these vulnerabilities creates a more stable indoor environment.
How Air Leaks Impact Your Home’s Efficiency and Comfort
Unwanted air movement compromises your living space’s thermal performance. Conditioned air escapes through various openings around access points.
The thermal bridging effect occurs when materials lack proper barrier properties. This allows heat transfer between interior and exterior environments.
Drafts create noticeable comfort issues throughout your living area. Temperature fluctuations and cold spots become common problems.
Your HVAC system must compensate for this constant air exchange. This increased workload reduces overall system efficiency.
Common Problem Areas: Identifying Gaps in Doors and Frames
Several locations typically experience significant air movement issues. The perimeter between the frame and moving component often shows visible openings.
Bottom clearance represents another critical area for air infiltration. Even small spaces here can create substantial drafts.
Hinge areas and lock mechanisms may develop gaps over time. These often overlooked spots contribute to overall performance issues.
Multiple small openings throughout your home create a cumulative effect. Each contributes to the overall challenge of maintaining consistent temperatures.
The Direct Financial Impact: How Sealing Lowers Your Energy Bills
Addressing air movement issues delivers immediate financial benefits. Draft-related expenses can reach $100-$300 annually for many households.
Increased HVAC operation adds $50-$150 to yearly costs. These combined expenses represent significant unnecessary spending.
Proper barrier installation reduces strain on climate control systems. This translates to lower operational costs and extended equipment life.
The right materials and professional installation techniques ensure long-lasting results. This investment pays for itself through reduced monthly expenses.
Homeowners can achieve hundreds of dollars in annual savings. These improvements make your living space more comfortable and cost-effective.
Conducting a Thorough Draft Inspection Around Your Doors
Finding hidden air movement issues requires careful examination of your entry points. A systematic approach reveals problem spots that impact your living environment.
Proper assessment helps you target the right solutions for maximum results. This process saves time and ensures your efforts deliver optimal performance.
The Simple DIY Methods for Detecting Air Leaks
Start with basic techniques using common household items. The candle test provides immediate visual feedback on air movement.
Light a candle and slowly move it around the door perimeter. Watch for flame flickering that indicates unwanted airflow.
Incense sticks or smoke pencils work similarly for detecting subtle drafts. The smoke trail shows exactly where air enters or escapes.
Daylight inspections reveal visible gaps around the frame edges. Stand inside on a bright day and look for light penetration.
Feel for temperature differences around the door edges during cold weather. Your hand can detect cool spots indicating air infiltration.
Document your findings with notes and measurements. This helps prioritize which areas need immediate attention.
Tools and Techniques for a Professional-Grade Assessment
Advanced methods provide comprehensive evaluation of your home’s performance. Thermal imaging cameras reveal temperature variations invisible to the eye.
These devices show heat patterns around door frames and edges. Cold spots indicate areas where air enters the living space.
Blower door tests create pressure differences to measure air leakage rates. Professionals use this method for whole-house assessments.
Basic tools enhance your inspection accuracy. A flashlight helps examine tight spaces and corners.
A mirror lets you check hard-to-see areas around hinges and hardware. Measuring tape documents gap sizes for proper material selection.
Conduct inspections during extreme weather conditions for best results. Winter months make drafts more apparent and easier to detect.
Always prioritize safety during your assessment. Keep flames away from flammable materials and work in well-ventilated areas.
Your findings guide the selection of appropriate solutions. This ensures your improvements address the most critical issues first.
Selecting the Right Materials for Effective Door Sealing
Choosing proper barrier materials determines your project’s success and longevity. The right selection creates lasting protection against outdoor elements.
Different situations require specific material characteristics and installation methods. Understanding these options helps you achieve optimal results.
Comparing Weather Stripping Types: V-Strip, Foam, Felt, and Tubular
V-strip weatherstripping features a durable plastic or metal V-shaped design. This tension-based solution works well in various gap sizes.
It provides excellent compression and spring-back action over time. This makes it suitable for side and top applications.
Foam tape options include both open-cell and closed-cell varieties. EPDM rubber versions offer enhanced durability with adhesive backing.
These materials work well for irregular surfaces and smaller openings. They provide good initial sealing but may require more frequent replacement.
Felt strips represent an economical choice for temporary solutions. Their typical lifespan ranges from one to two years.
This material works best in low-traffic areas with minimal moisture exposure. It provides basic protection at lower initial costs.
Tubular weatherstripping uses rubber, vinyl, or silicone construction. These materials excel in high-use areas with frequent operation.
Their rounded design creates excellent compression and recovery properties. This ensures consistent performance through countless cycles.
Choosing the Best Door Sweep and Threshold Solutions
Bottom sealing requires specialized solutions for different situations. Adjustable vinyl models offer flexibility for various clearance needs.
Aluminum door-bottom seals provide durable protection against air movement. These work well with existing threshold systems.
Door shoes feature a comprehensive approach to bottom sealing. They combine sweep protection with threshold integration.
Bulb thresholds create a compressible seal against the door bottom. These work well for moderate climate conditions.
Frost-brake systems prevent cold transfer in freezing environments. They maintain performance through extreme temperature changes.
Why Energy Star Certified Products Offer Superior Performance
Energy Star certification ensures products meet strict efficiency guidelines. These materials undergo rigorous testing for air sealing capabilities.
Certified products typically deliver better moisture resistance and longevity. This translates to reduced environmental impact over time.
Performance metrics include air sealing effectiveness and durability ratings. These standards help homeowners make informed purchasing decisions.
The certification process evaluates materials under various climate conditions. This ensures reliable performance across different geographic regions.
Investing in certified products often provides better long-term value. While initial costs might be higher, the extended lifespan justifies the expense.
These materials contribute to overall home efficiency improvements. They help create more comfortable living environments while reducing monthly expenses.
Gathering Your Toolkit for a Successful DIY Project
Proper preparation separates successful projects from frustrating experiences. Having the right equipment ensures smooth progress and professional results.
Your tool selection directly impacts installation quality and project duration. Investing in appropriate tools saves time and reduces potential complications.
Essential Tools: From Measuring Tape to Utility Knives
Precision measuring instruments form the foundation of any installation project. Quality tape measures provide accurate gap assessments for material selection.
Angle finders help navigate complex frame geometries. They ensure proper material alignment throughout the installation process.
Cutting tools require special consideration for different material types. Fresh utility knife blades deliver clean cuts on foam and rubber strips.
Heavy-duty scissors handle thicker materials effectively. Metal strips may require specialized cutting tools for proper sizing.
Fastening tools complete your basic equipment collection. Hammers and finishing nails work well for traditional installation methods.
Staple guns offer alternative attachment options for certain applications. Screwdrivers and drills handle hardware-intensive components.
Materials Checklist: Ensuring You Have Everything You Need
Surface preparation products create ideal bonding conditions for new materials. Cleaning solutions remove dirt and grease from frame surfaces.
Scrapers and sandpaper address uneven areas effectively. Adhesive removal products handle stubborn residue from previous installations.
Safety equipment protects during all project phases. Gloves shield hands from sharp edges and adhesive chemicals.
Eye protection prevents debris-related injuries during cutting operations. Knee pads provide comfort during extended installation periods.
Specialty tools address specific application requirements. Caulking guns handle sealant applications in stationary gaps.
Rubber mallets assist with gentle component adjustments. Installation rollers ensure proper adhesive contact throughout the surface.
Organization strategies keep your work area efficient and safe. Designated tool stations prevent misplacement and streamline your workflow.
Backup tools prepare you for unexpected challenges during installation. Having alternatives available maintains project momentum.
Quality considerations guide your tool selection process. Precision instruments deliver better results and longer-lasting performance.
Preparing Your Door and Frame for a Flawless Installation
Successful barrier projects begin with meticulous surface preparation. This foundation determines how well your new materials perform over time.
Step-by-Step Guide to Cleaning and Surface Preparation
Start by removing all existing weatherstripping materials. Use a putty knife to gently pry away old strips without damaging surfaces.
Clean the entire frame with a mild soap solution. This removes dirt and grease that could prevent proper adhesion.
Rinse thoroughly with clean water and allow complete drying. Moisture compromises adhesive performance and material longevity.
Inspect for hidden damage like rot or warping. Address these issues before proceeding with your project.
Removing Old, Worn-Out Weatherstripping and Adhesive
Stubborn adhesive requires specialized removal techniques. Use citrus-based solvents for safe residue elimination.
Avoid harsh chemicals that might damage your door’s finish. Test any solvent on a small hidden area first.
For painted-over weatherstripping, carefully score the paint line. This prevents surface damage during removal.
Different door materials need specific approaches. Wood requires gentle handling while metal frames tolerate more aggressive methods.
Always wear protective gloves during this process. Proper safety measures prevent injuries from sharp tools or chemicals.
Dispose of old materials according to local regulations. Many communities have specific guidelines for adhesive product disposal.
Final inspection ensures surface readiness for new installation. Your frame should be clean, dry, and damage-free.
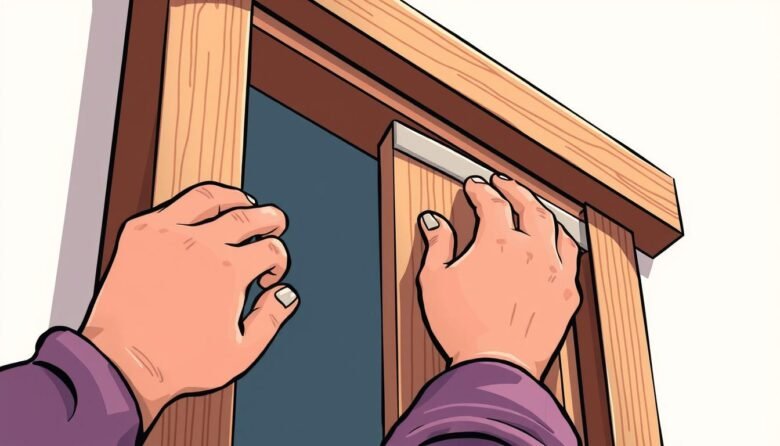
A Step-by-Step Guide to Installing Weather Stripping
Proper installation techniques transform quality materials into lasting protection for your living space. Following precise methods ensures your weatherstripping performs optimally through seasonal changes.
Careful attention to detail during this process creates a continuous barrier against outdoor elements. This approach maximizes your investment in comfort improvements.
Precise Measuring and Cutting Techniques for a Perfect Fit
Accurate measurements form the foundation of successful weatherstripping projects. Always measure each side separately rather than assuming uniform dimensions.
Account for slight variations in your frame’s construction. These small differences impact how materials fit and perform.
Add approximately 1/8 inch to each measurement for proper compression. This extra length ensures complete coverage without stretching materials.
Cut foam strips using sharp scissors for clean edges. Vinyl and rubber materials benefit from utility knife cuts on a protected surface.
Metal strips require specialized cutters for precise results. Always wear safety glasses when cutting harder materials.
Application Methods for Adhesive-Backed and Nail-In Strips
Adhesive-backed materials demand proper surface preparation for optimal bonding. Clean frames thoroughly and allow complete drying before application.
Peel backing slowly while pressing the strip firmly into position. Work in small sections to maintain alignment and avoid wrinkles.
Apply consistent pressure along the entire length after placement. This ensures full adhesive contact with the surface.
Nail-in strips require careful spacing for secure attachment. Place fasteners approximately every 6-8 inches for most applications.
Use finishing nails that won’t protrude through the material. Countersink nails slightly below the surface for clean appearance.
Sealing Corners and Complex Areas for a Continuous Barrier
Corner joints represent critical points in weather barrier integrity. Miter cuts create clean transitions between perpendicular sections.
Overlap methods work well for certain material types. Ensure overlaps face away from prevailing weather patterns.
Complex architectural details may require custom solutions. Flexible materials adapt better to irregular shapes and angles.
Test door operation frequently during installation. Adjust material placement if you encounter resistance or binding.
Final inspection verifies consistent compression throughout the perimeter. Your weatherstripping should contact surfaces evenly when closed.
Installing a Door Sweep to Eliminate Bottom Drafts
Addressing air movement at the base of your entryways creates a complete thermal barrier. This component prevents outdoor elements from entering while retaining conditioned air inside your living area.
Proper installation ensures consistent performance through seasonal changes. The right approach delivers immediate comfort improvements and long-term value.
Measuring and Cutting the Sweep for an Exact Fit
Begin by determining the exact width of your entryway. Use a steel tape measure for precision across the bottom edge.
Account for any threshold variations or architectural details. Note these measurements before selecting your cutting tool.
Vinyl and aluminum materials require different cutting approaches. Use tin snips for metal components and heavy-duty scissors for flexible options.
Always cut slightly longer than your measured length. You can trim further during test fitting for perfect alignment.
Test the cut piece against your entryway before final installation. Ensure it spans the entire width without binding at the edges.
Securing the Sweep: Alignment and Fastening Best Practices
Position the sweep against the interior surface of the entryway. Ensure it contacts the threshold evenly when closed.
Mark screw hole locations using a pencil or marker. Space fasteners approximately every 8-10 inches for secure attachment.
Pre-drill pilot holes for screw placement in wood surfaces. This prevents splitting and ensures proper fastener alignment.
Use stainless steel screws for corrosion resistance in all climates. Tighten until snug without over-compressing the material.
Test operation repeatedly during the fastening process. Adjust positioning if you notice any interference with smooth movement.
Final verification confirms consistent contact along the entire threshold. Your sweep should create a complete barrier without impeding function.
Advanced Sealing Techniques for Maximum Efficiency
Elevating your home’s protection requires moving beyond basic weatherstripping applications. These advanced methods create comprehensive barriers that deliver superior performance.
Mastering these techniques transforms your living space into a consistently comfortable environment. The right approach addresses multiple entry points simultaneously.
Using Caulk to Seal Stationary Gaps in the Door Frame
Caulking provides excellent solutions for permanent openings around your entryway frame. This material creates durable seals in non-moving areas.
Select the appropriate sealant based on gap size and environmental conditions. Silicone options offer flexibility for temperature changes.
Acrylic latex works well for painted surfaces and indoor applications. Each material provides specific advantages for different situations.
Proper application begins with thorough surface cleaning and preparation. Remove any old material and ensure complete dryness.
Cut the caulk tube nozzle at a 45-degree angle for optimal bead control. Maintain consistent pressure while moving steadily along the gap.
Use a smoothing tool or wet finger for professional-looking finishes. This technique ensures complete adhesion without air pockets.
Allow adequate curing time before testing your work. Most products require 24-48 hours for full performance.
Combining Door Sealing with Window Insulation for Whole-Home Savings
Integrating entryway improvements with window treatments creates comprehensive home efficiency. This approach addresses multiple heat loss areas simultaneously.
Coordinate materials and methods across different building elements. Consistent products ensure uniform performance throughout your space.
Develop a systematic plan before beginning any project. Measure all openings and calculate material requirements accurately.
Consider seasonal factors when scheduling your improvements. Cooler months often reveal the most critical areas needing attention.
This holistic strategy delivers greater comfort and financial benefits. You’ll notice improved temperature consistency throughout your living area.
Many homeowners report significant reductions in their monthly bills. These comprehensive upgrades pay for themselves over time.
Regular maintenance ensures long-term performance of all sealed areas. Schedule seasonal inspections to catch any developing issues early.
Maintaining Your Door Seals for Long-Term Performance
Preserving the integrity of your entryway barriers requires consistent attention and proper maintenance routines. Regular care ensures your protective installations continue performing optimally through seasonal changes and daily use.
Developing systematic evaluation habits helps catch issues before they impact your living environment. This proactive approach extends material lifespan while maintaining comfort levels.
Seasonal Inspection Routines to Ensure Ongoing Efficiency
Establish quarterly check-ups for your protective systems. Spring and fall transitions represent ideal times for comprehensive evaluations.
Create a simple checklist for systematic assessment. Include visual inspection, compression testing, and operational smoothness.
Document findings in a maintenance log for trend analysis. Track performance changes across different weather conditions.
Adjust evaluation frequency based on climate severity. Harsh winter regions may require monthly checks during cold months.
High-traffic entry points need more frequent attention. Main access areas typically show wear patterns faster than secondary ones.
Identifying Signs of Wear and When to Replace Materials
Visible gaps between components indicate replacement time. Compression loss reduces barrier effectiveness significantly.
Material cracking or brittleness suggests aging beyond useful life. Flexible strips should maintain their spring-back qualities.
Increased climate control expenses often signal failing barriers. Monitor utility statements for unusual consumption patterns.
Difficulty operating entryways may indicate interference issues. Properly installed materials should not impede smooth movement.
Most weather protection products last 2-5 years with proper care. Extreme conditions or heavy use may shorten this timeframe.
Develop replacement schedules based on material types and exposure. Synthetic rubber typically outlasts foam options in similar conditions.
Budget for periodic renewals as part of home maintenance. Regular updates prevent sudden comfort issues and unexpected expenses.
Evaluating the DIY Path Versus Hiring a Professional
Choosing between tackling projects yourself or hiring experts requires careful consideration. Your decision impacts results, expenses, and long-term performance.
Both approaches offer distinct advantages for different situations. Understanding these differences helps you make informed choices.
Assessing Your Project’s Complexity and Your Skill Level
Evaluate your comfort with basic home improvement tasks first. Simple foam strip applications suit most beginner skill levels.
Complex installations demand advanced measuring and cutting abilities. Multiple entry points increase project difficulty significantly.
Consider your available time for learning proper techniques. Rushed installations often lead to compromised results.
Historical buildings or unusual frame designs present special challenges. These situations typically benefit from professional attention.
Cost-Benefit Analysis: When Professional Installation Is Worth the Investment
Calculate material expenses against service quotes for accurate comparisons. Professional services include labor, expertise, and warranty protection.
High-value properties justify expert installation for optimal performance. Commercial applications almost always require professional handling.
Mistakes in DIY projects can increase overall expenses significantly. Improper installations may worsen existing air movement issues.
Time savings represent another important consideration. Experts complete projects faster with guaranteed quality outcomes.
Many homeowners find peace of mind through professional guarantees. These assurances protect your investment against future issues.
Evaluate your long-term plans for the property before deciding. Temporary residences might not justify premium service costs.
Taking the Next Step Toward a More Energy-Efficient Home
Implementing proper weatherstripping creates immediate comfort improvements throughout your living space. These solutions address air movement issues that impact temperature consistency.
According to U.S. Department of Energy data, comprehensive sealing can reduce heating and cooling costs by over 20%. This represents significant financial benefits for homeowners.
Develop an action plan that prioritizes critical areas first. Expand your efforts to include windows and other potential heat loss points.
Track your monthly bills to measure actual performance improvements. Many utility companies offer programs supporting these efficiency upgrades.
Your investment in better materials pays dividends through enhanced comfort and lower expenses. Take action today to enjoy a more efficient home environment.