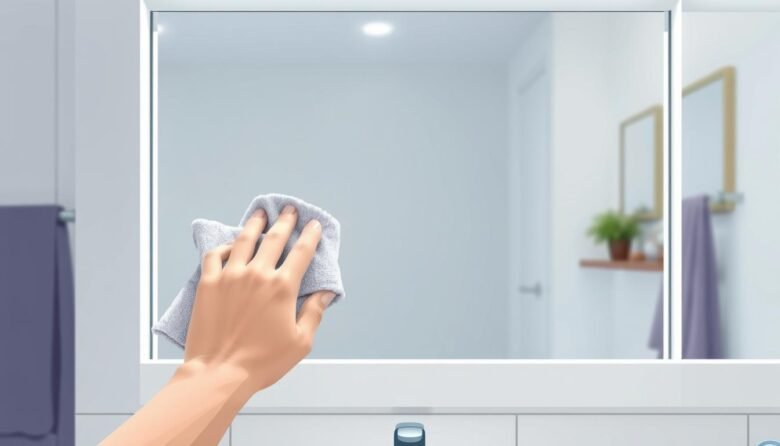
Many people struggle with frustrating smears on their reflective surfaces. Despite good intentions, these surfaces often look worse after wiping them down.
Experts confirm that improper techniques cause this problem. Using random methods leads to more dirt and visible marks.
This guide provides a professional method for crystal clear results. You will achieve a perfect finish with simple household items.
The solution uses white vinegar, water, and soft cloths. This eco-friendly approach saves time and avoids wasted effort.
Follow steps like dry dusting and the two-towel system. These practices ensure long-lasting clarity and bathroom cleanliness.
Key Takeaways
- Improper cleaning methods often make mirrors look worse
- Expert techniques are essential for streak-free results
- Basic household items create an effective cleaning solution
- Proper preparation like dry dusting improves final results
- The two-towel system prevents streaks and smears
- This method saves time and provides professional-quality results
- Regular maintenance keeps mirrors looking their best
The Universal Frustration of Streaky Mirrors and the Path to a Perfect Shine
Foggy, spotted glass surfaces plague countless households across America. These frustrating imperfections appear even after diligent wiping attempts.
Professional cleaners identify moisture residue as the primary culprit. This leftover liquid dries unevenly, creating those visible lines. Daily exposure to bathroom humidity and vanity light heat accelerates this process.
A cloudy looking surface affects more than just your appearance. It creates a psychological impression of overall uncleanliness throughout the room. Experts confirm this visual pollution impacts how we perceive our entire space.
The solution involves abandoning common errors and adopting proven methods. Circular wiping patterns, for instance, guarantee unsatisfactory results. Paper products leave behind lint and dissolve into pulp.
Effective DIY approaches use simple home items instead of harsh chemicals. White vinegar mixed with water creates an excellent cleaning mixture. This combination cuts through grime without damaging the delicate surface.
Proper technique delivers remarkable results in minimal time. You can achieve professional-quality clarity without spending hours scrubbing. The right approach prevents future build-up and maintains that flawless reflection.
This guide provides expert-backed methods that actually work. We’ll show you how to transform frustrating surfaces into crystal-clear perfection. The next section details the essential tools for this transformation.
Gathering Your Arsenal: Essential Tools for a Flawless Finish
Professional results begin with selecting the right equipment. Having proper tools makes the entire process smoother and more effective.
Quality materials prevent common frustrations like lint residue and uneven drying. They transform a tedious chore into a quick, satisfying task.
The Indispensable Microfiber Cloth
Experts consistently recommend microfiber over traditional options. These specialized textiles offer superior performance for glass surfaces.
Microfiber cloths absorb liquid effectively without leaving particles behind. Their flat-weave design lifts grease while preventing scratches.
Fold your cloth into quarters before starting. This creates multiple clean sides for efficient wiping and buffing. Always begin with a completely clean cloth dedicated only to this purpose.
Choosing or Making Your Cleaning Solution
Effective mixtures require simple ingredients already in your home. DIY approaches avoid harsh chemicals while delivering excellent results.
Combine equal parts white vinegar and water in a bottle. This classic mixture cuts through grime without damaging the surface.
For stubborn marks, create a cornstarch paste with water. Apply directly to problem areas before wiping clean. Use rubbing alcohol on a cotton pad for toothpaste spots.
Commercial options like Sprayway provide ammonia-free alternatives. These ready-made products work well when time is limited.
Additional Helpful Items
A spray bottle ensures even application across the entire surface. This prevents over-saturation that leads to uneven drying.
Cotton balls reach tight corners where larger cloths cannot fit. A squeegee helps achieve uniform coverage on larger surfaces.
Always avoid using paper products during this process. They disintegrate and leave behind fibers that create visible lines.
Store your dedicated cloth nearby for quick maintenance between thorough cleanings. Proper tool selection and maintenance ensure lasting clarity.
With these items prepared, you’re ready to begin the actual process. The next section covers crucial preparation steps before application.
Step 1: The Critical Pre-Cleaning Preparation
Expert cleaners universally agree that pre-cleaning steps determine the final outcome. This initial phase prevents common frustrations and ensures your cleaning solution works effectively.
Dry Dusting for Initial Debris Removal
Begin with a completely dry microfiber cloth dedicated to this purpose. Gently stroke across the entire surface to capture loose particles.
This dry approach prevents dust from sticking when moisture is introduced. Loose debris could otherwise cause visible lines during the main cleaning phase.
Professional cleaner Melissa Maker emphasizes this technique reduces streaking significantly. Always use a clean section of your microfiber for each area to avoid redistributing dirt.
Targeting Stubborn Spots and Build-up
Isolate problem areas before general cleaning begins. Common trouble spots include toothpaste splatters and water marks.
Apply white vinegar or rubbing alcohol directly to these areas using a cotton pad. This pre-treatment breaks down stubborn residue without spreading grime.
Working on spots first saves considerable time later. It prevents recontamination during the main cleaning process.
Skipping this preparation often leads to cloudy results despite your best efforts. The surface becomes ready for solution application only after thorough pre-cleaning.
Your glass will now accept the cleaning mixture more effectively. This careful preparation ensures the streak-free shine you desire.
Step 2: Mastering the Application and Cleaning Technique
Proper application transforms your prepared surface into a flawless finish. This phase requires precision and the right movements.
Many people make errors during this critical stage. They apply too little product or use incorrect motions.
Brandon Pleshek emphasizes direct spraying for complete coverage. This method ensures every inch receives adequate attention.
How and Where to Apply Your Cleaner
Spray your solution directly onto the glass surface. Aim for even distribution across the entire area.
Using sufficient product prevents streaking from insufficient moisture. Cover from top to bottom without missing spots.
Work quickly to prevent drips into the frame. Turn off vanity lights to avoid premature drying.
Your surface should appear lightly coated but not dripping. This prepares it for the next important step.
The Optimal Wiping Pattern for Streak-Free Results
Begin at the top right corner with your microfiber cloth. Move across to the top left in a smooth motion.
Create an “S” pattern as you work downward. Reverse your tracks systematically to cover all areas.
Avoid circular motions that redistribute grime. This technique prevents visible lines and uneven results.
Your systematic approach ensures no section gets overlooked. The entire surface receives uniform attention.
Finish with a damp but not wet appearance. This indicates perfect preparation for final buffing.
Step 3: The Final Buff and Inspection for a Brilliant Shine
The ultimate clarity of your glass surface depends on this final phase. Proper buffing removes residual moisture that causes visible lines.
This stage transforms a good result into professional perfection. It ensures your efforts produce the desired crystal-clear appearance.
The Two-Towel System: Clean Then Dry
Begin with your damp microfiber cloth to apply the vinegar solution. Use smooth, overlapping strokes across the entire area.
Immediately follow with a completely dry microfiber towel. This second cloth absorbs leftover moisture before it dries unevenly.
Brandon Pleshek emphasizes buffing with a dry microfiber towel prevents streaks. Use gentle, even pressure in straight motions.
Fold your cloth to access clean sections as you work. This prevents re-smudging and ensures consistent results.
The two-towel approach guarantees no moisture remains on the surface. Your glass achieves that perfect reflective quality.
Inspecting Your Work from All Angles
Turn on all bathroom lights to create optimal viewing conditions. Stand directly before your surface for the initial check.
Slowly tilt your head to view from different perspectives. Move side to side while observing the entire area.
This multi-angle inspection reveals lines that appear invisible head-on. Catch these imperfections early for quick corrections.
Use your dry cloth to address any remaining issues. Light buffing resolves most problems without re-cleaning.
Thorough inspection ensures truly streak-free results. Your surface maintains its brilliance between maintenance sessions.
Enjoy the satisfaction of a perfectly executed task. Your reflection now appears with absolute clarity and precision.
Proactive Maintenance: Keeping Your Mirrors Spotless Longer
Your beautiful streak-free results can last much longer with proper upkeep. Consistent maintenance prevents the need for frequent deep cleaning sessions.
Simple daily habits protect your investment in time and effort. These practices maintain that professional-quality appearance between thorough cleanings.
Daily and Weekly Upkeep Habits
Begin with quick dry dusting using a microfiber cloth. This daily practice removes surface particles before they accumulate.
Regular dusting prevents build-up that requires stronger cleaning methods. Keep your dedicated cloth nearby for immediate smudge removal.
Avoid direct sunlight during maintenance routines. Quick drying causes uneven results and visible lines.
Perform light weekly wiping with your vinegar and water mixture. This gentle approach maintains clarity without extensive effort.
Rotate your cloth during each session to prevent dirt redistribution. Use clean sections for optimal performance.
Advanced Tips for Specific Scenarios
Large surfaces benefit from squeegee use after cleaning. This tool ensures even solution removal across expansive areas.
Newspaper works exceptionally well for final drying. Its absorbency and gentle texture create remarkable clarity.
Apply shaving cream to prevent fogging issues. This technique also polishes chrome fixtures to brilliant perfection.
Address hard-to-reach areas with a soft toothbrush. Cotton balls work perfectly for detailed spot treatment.
Professional assistance ensures safety for specialty glass surfaces. Experts handle custom installations without risk of damage.
These maintenance strategies significantly reduce deep-cleaning frequency. You’ll enjoy more time admiring your reflection than cleaning it.
Enjoying the Crystal-Clear Reflection of Your Efforts
You now possess professional-grade techniques for maintaining flawless glass surfaces. These methods transform frustrating chores into quick, satisfying tasks.
Simple household items create remarkable results without expensive products. Your bathroom gains enhanced aesthetics through proper maintenance.
Share these effective approaches with friends and family. Help others achieve the same sparkling perfection in their homes.
Regular upkeep ensures lasting clarity between deep sessions. Enjoy both the visual appeal and personal satisfaction of a job well done.


