Your home’s surfaces deserve a flawless finish that complements modern design. Achieving visual harmony between different areas creates a cohesive, professional look throughout your space.
This guide provides detailed instructions for blending various surface finishes. You’ll learn techniques for creating seamless transitions between new and existing treatments.
We cover essential methods for orange peel, knockdown, and popcorn finishes. Proper preparation and the right joint compound ensure lasting results.
Following these steps will help you achieve a professional-grade outcome. Attention to detail during the application process makes all the difference in your final finish.
Key Takeaways
- Visual continuity is essential for modern interior design aesthetics
- Proper identification of existing texture types is crucial for matching
- Quality tools and materials significantly impact the final results
- Technique practice on sample surfaces prevents common mistakes
- Blending methods like feathering create imperceptible transitions
- Patience during drying times ensures professional-quality outcomes
Understanding the Importance of Modern Wall Texture Matching
Today’s interior styles emphasize continuous visual narratives where surfaces tell a cohesive story. This approach creates spaces that feel intentionally designed rather than randomly assembled.
Proper surface treatment integration maintains this design integrity throughout your home. It ensures every area contributes to the overall aesthetic vision.
Why Visual Continuity is Key in Modern Design
Contemporary interiors rely on seamless transitions between different areas. Disruptions in surface patterns immediately catch the eye and break the visual flow.
The human brain naturally seeks patterns and consistency. When it encounters breaks in texture repetition, attention focuses on these irregularities.
This psychological response makes proper blending essential. Even minor inconsistencies can become focal points for all the wrong reasons.
The Functional Role of Texture in Today’s Interiors
Surface treatments serve multiple practical purposes beyond decoration. They help conceal minor imperfections in construction materials.
Textured finishes diffuse artificial and natural lighting effectively. This reduces harsh shadows and creates softer, more comfortable environments.
These treatments also add acoustic benefits by dampening sound reflections. This functional aspect enhances both comfort and privacy in modern living spaces.
Different texture types interact uniquely with light sources. This creates distinctive shadow patterns that contribute to room character.
Maintaining these patterns during any surface work preserves the intended design effect. It ensures the space maintains its original aesthetic appeal.
Identifying Your Existing Wall Texture Type
Before beginning any surface enhancement project, properly recognizing the existing finish type ensures successful matching and professional results. Each treatment requires specific materials and application methods for accurate replication.
Careful examination reveals subtle differences between surface treatments. Pattern consistency, depth measurement, and visual characteristics help determine the exact type.
The Subtle and Modern Orange Peel Finish
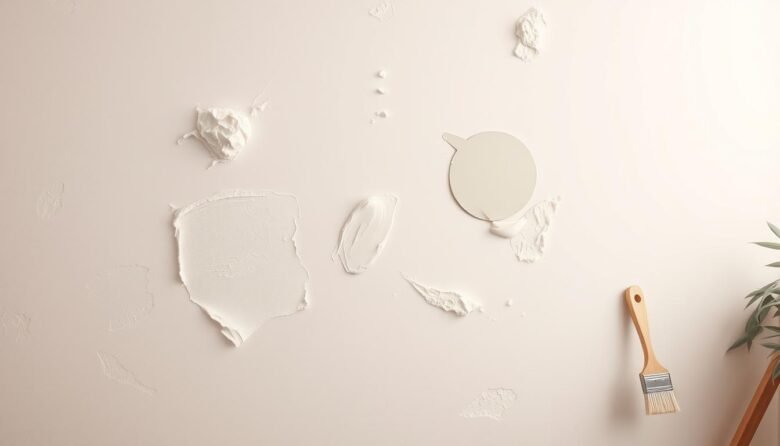
This popular treatment resembles citrus fruit skin with its fine, randomized dimples. The orange peel finish maintains a consistent depth of 1-2 millimeters across the surface.
Modern homes frequently use this approach in living areas and bedrooms. It creates a soft, refined appearance that feels smooth to the touch.
The randomized pattern helps conceal minor imperfections effectively. This makes it ideal for contemporary interiors seeking minimal visual disruption.
The Rustic-Contemporary Knockdown Texture
This treatment creates a stucco-like appearance with distinctive flattened peaks. Application involves spraying material then smoothing with a putty knife.
The knockdown texture offers medium depth ranging from 2-4 millimeters. It adds character while hiding construction flaws in entryways and feature walls.
This option works well with rustic or southwestern design themes. The unique pattern creates visual interest through light and shadow play.
The Classic (But Cautious) Popcorn Texture
This highly textured finish features a rough, bumpy surface with significant depth. Ranging from 3-8 millimeters, it effectively dampens sound and conceals ceiling imperfections.
Popcorn applications were popular from the 1950s through the 1990s. Pre-1980s installations may contain asbestos, requiring professional consultation.
This treatment primarily appears on ceilings rather than vertical surfaces. Extra care is essential when working with older applications due to potential health risks.
Proper identification prevents mismatched treatments and wasted effort. Each type demands specific techniques for seamless integration.
Gathering Your Tools and Materials for a Professional Finish
Proper preparation with quality equipment makes your surface enhancement project successful. Investing in the right items ensures efficient work and superior outcomes.
Organize your workspace before starting any application. This approach saves time and prevents interruptions during critical stages.
Essential Application and Safety Equipment
Safety comes first in any home improvement task. Always wear protective glasses and a dust mask.
Cover floors and furniture with plastic drop cloths. Use painter’s tape to protect trim and edges.
A bright work light reveals surface details during application. This helps achieve consistent results across the entire area.
Putty knives in various sizes help smooth materials. A wide knockdown knife creates uniform patterns.
Selecting the Right Compounds and Paints
Choose quality products designed for specific surface types. DAP’s 2-in-1 Wall & Ceiling Spray Texture works well for many projects.
Its AIM TECH nozzle provides precise control during application. The water-based formula dries quickly and accepts paint easily.
Mix drywall compound with water using a 4:1 ratio. The ideal consistency resembles smooth cake batter.
Primer seals chalky surfaces before painting. This prevents moisture absorption and ensures even color.
Select paint sheen based on your desired look. Flat finishes soften appearance while glossier options highlight patterns.
Test your mixed material on scrap surfaces first. This confirms proper consistency and spray pattern matching.
Clean equipment thoroughly after each use. Proper maintenance ensures tools remain ready for future projects.
Executing Trending Wall Repair, Texture Match, and Paint Tricks
Proper application methods transform your surface enhancement project from challenging to rewarding. Following precise steps ensures your new finish blends perfectly with existing areas.
Each technique requires specific approaches for optimal results. Mastering these methods creates professional-looking outcomes in your home.
Step-by-Step Guide to Orange Peel Application
Begin by shaking the spray can upside down for one full minute. This mixes the material thoroughly for consistent application.
Test your spray pattern on scrap drywall or cardboard first. Hold the can 30-45 centimeters from the surface during testing.
Use smooth, sweeping bursts across the work area. Maintain consistent speed and distance for uniform coverage.
Feather the edges where new application meets existing finish. This technique prevents visible lines between sections.
Allow thirty minutes drying time before painting. This ensures proper adhesion and prevents texture damage.
Mastering the Knockdown Technique
Spray the material using the same preparation as orange peel. The key difference comes after application.
Allow set time based on your desired pattern density. Fine textures require immediate smoothing after spraying.
Medium patterns need 30-60 seconds setting time. Heavy applications benefit from 1-2 minutes before smoothing.
Use a putty knife dipped in water to flatten peaks. Light pressure creates the characteristic flattened appearance.
Thirty minutes drying completes the process. The finished surface should feel smooth to the touch.
Applying and Blending Popcorn Texture
Shake the can vigorously and test spray before application. This finish requires careful layering for best results.
Apply in multiple thin coats rather than one heavy application. Allow five minutes between coats to prevent sagging.
Ensure proper ventilation throughout the process. This material produces more overspray than other types.
Dry for thirty minutes before considering painting. Some homeowners prefer the natural finish without color.
Extend application four to six inches beyond repair areas. This overlapping ensures seamless blending with existing surfaces.
Always wear safety glasses and a dust mask during application. Protect surrounding areas with drop cloths against overspray.
Practice on sample materials before working on your actual project. Scrape off and restart if the pattern doesn’t match properly.
Drying times may vary with humidity and temperature. Use fans to accelerate drying in cool conditions.
Adjust spray distance for heavier or lighter finishes. Closer application creates denser patterns while farther distance gives lighter coverage.
These techniques produce professional results when followed carefully. Patience during each step ensures your desired outcome.
Advanced Techniques for a Flawless, Seamless Blend
Mastering these professional methods elevates your surface work from basic repair to invisible integration. The difference lies in subtle application details that create perfect harmony between new and existing areas.
Advanced blending requires attention to light, pressure, and material consistency. These elements work together to eliminate visible transitions.
Feathering and Layering for Imperceptible Transitions
Feathering creates gradual edges that disappear into surrounding surfaces. Ease up on application pressure near repair borders.
This technique prevents hard lines that make patches stand out. Use smooth, sweeping motions across transition zones.
Layering involves multiple light coats instead of one heavy application. Building density slowly matches surrounding surfaces perfectly.
This approach prevents sagging and ensures consistent pattern replication. Allow proper drying time between thin coats.
Matching the Age and Wear of the Existing Texture
Older surfaces show natural aging through color changes and wear patterns. Replicate this character for authentic blending.
Take reference photos from multiple angles before starting your project. These images guide pattern replication and application density.
Consider how light reflects off aged surfaces in your home. Older finishes often need lighter application to match faded areas.
Gentle sanding may help blend transition zones if needed. Avoid over-sanding to prevent damaging the original pattern.
Extend new material four to six inches beyond repair areas. This creates a smooth transition zone into existing surfaces.
Bright, direct lighting reveals inconsistencies during application. Adjust your technique until patterns align perfectly.
Practice these methods on scrap materials before actual work. Perfect your technique where mistakes don’t matter.
These professional approaches ensure your finished project looks original. Attention to detail makes repairs disappear into surrounding surfaces.
Pro Tips to Avoid Common Texturing Pitfalls
Expert approaches prevent frustrating mistakes during your surface enhancement journey. Smart preparation and technique refinement deliver superior outcomes every time.
These professional insights help you navigate potential challenges confidently. They transform difficult tasks into manageable steps toward perfection.
Testing and Practicing Your Technique
Always begin with scrap drywall or cardboard pieces. This practice space lets you perfect your method without pressure.
Study the existing finish’s pattern density and depth carefully. Take reference photos from multiple angles for accurate matching.
Adjust your spray distance based on desired results. Closer application creates heavier coverage while farther distance produces lighter effects.
Consider the age of surrounding surfaces. Older areas often need lighter applications to blend naturally.
Practice feathering edges on your test materials. This skill creates invisible transitions between sections.
Managing Consistency and Drying Times
Mix your compounds to proper viscosity before starting. The ideal consistency resembles smooth cake batter.
Allow minimum thirty minutes drying between stages. Cool or humid conditions require extended waiting periods.
Use fans to accelerate the process when necessary. Avoid rushing as this causes poor adhesion and uneven results.
Apply multiple light coats instead of one heavy layer. This approach prevents sagging and ensures better pattern matching.
Check material compatibility before beginning your project. Some modern products don’t match original compositions.
Clean your equipment thoroughly after each use. Proper maintenance prevents clogs and ensures consistent performance.
These professional tips help you achieve flawless integration. Attention to detail makes your work indistinguishable from the original.
Achieving a Professional-Grade Result on Your DIY Project
Modern products like DAP’s 2-in-1 Spray Texture make professional outcomes accessible for DIY enthusiasts. The AIM TECH nozzle provides precise control during application.
Patience during preparation and blending creates invisible repairs. These water-based formulations dry quickly and accept paint readily.
Complete surface restoration often finishes within a single day. This efficiency saves significant time and effort.
Practice feathering and layering techniques on sample areas first. This builds confidence before working on actual surfaces.
Successful texture integration maintains both aesthetic appeal and functional benefits. It preserves sound dampening and imperfection concealment.
Document your progress with before-and-after photographs. Share these achievements on social media to inspire others.
Always prioritize safety and proper tool maintenance throughout your project. These practices ensure long-lasting, professional-looking results.
With the right materials and methods, anyone can master surface enhancement. Transform your home with confidence and skill.

Ava Harrington is a home improvement writer and DIY enthusiast with over eight years of hands-on experience maintaining, renovating, and documenting residential properties across the United States. She writes practical, no-fluff guides on home care, preventive maintenance, and everyday repairs — helping homeowners protect their properties without overspending or overcompleting.