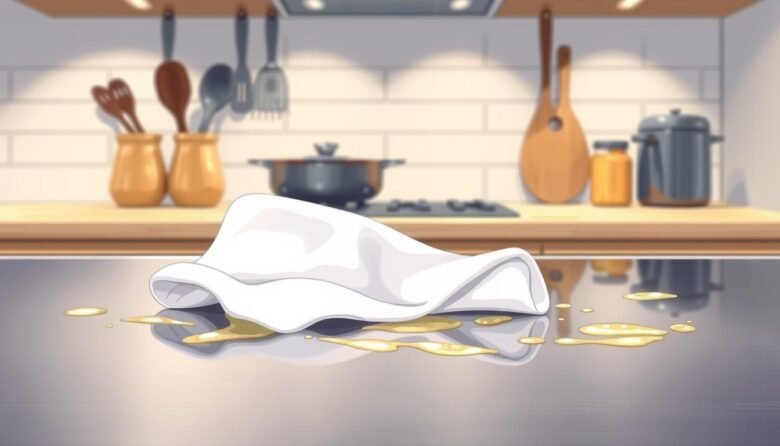
Many homeowners struggle with stubborn kitchen grease that accumulates over time. The solution might be simpler than you think, using items already in your home.
According to Karina Toner, operations manager at Spekless Cleaning, dish soap combined with warm water creates the most effective degreasing solution. This combination outperforms many specialized commercial products.
The warm water helps soften the buildup while the soap emulsifies and breaks it down. This powerful duo works on various areas throughout your cooking space.
The process requires minimal equipment and delivers exceptional results. You simply mix, apply, and remove with a cloth.
This approach saves both time and money compared to purchasing multiple specialized cleaning products. It provides a comprehensive solution for different situations.
Key Takeaways
- Dish soap and warm water create the most effective grease removal solution
- This method outperforms many commercial degreasing products
- Warm water softens grease while dish soap breaks it down
- The process requires minimal equipment and household items
- Works effectively on various kitchen surfaces and situations
- Saves both time and money compared to specialized products
- Professional cleaning experts recommend this simple approach
Understanding Kitchen Grease and Its Cleaning Challenges
The sticky nature of cooking oils creates persistent problems throughout food preparation areas. These lipid-based substances spread through splashes and vaporization during meal preparation.
Once settled, they form tenacious bonds with various materials. This creates challenging situations for homeowners seeking to maintain a clean environment.
Why Grease Is Particularly Difficult to Remove
Grease molecules possess a unique non-polar structure. This oily composition makes them repel water-based solutions.
Heat from cooking transforms liquid oils into solid residues. This phase change creates stubborn buildup that resists simple removal methods.
Porous materials trap these molecules deep within their structure. The physics of surface adhesion works against easy cleaning efforts.
The Science Behind How Grease Adheres to Surfaces
Molecular attraction forces create strong bonds between grease and various materials. These van der Waals forces are particularly strong with non-polar substances.
Temperature fluctuations affect viscosity and adhesion strength. Cooler conditions make grease more solid and difficult to dissolve.
Delayed attention allows combination with dust particles. This creates complex composite stains that require specialized approaches.
Common Problem Areas in the Kitchen
Stovetops and range hoods receive direct exposure during cooking activities. They accumulate significant amounts of oily residue over time.
Backsplashes catch splatters and airborne particles. Their vertical position makes them prime collection points.
Cabinet fronts and handles gather transfer from hands during meal preparation. This creates subtle but persistent staining.
Stainless steel appliances show marks prominently due to reflective properties. Their smooth surfaces highlight even minor residue.
Upper walls and ceilings collect airborne particles that settle over time. These areas often get overlooked during routine maintenance.
Essential Tools and Preparations for Effective Grease Removal
Proper preparation transforms challenging degreasing tasks into manageable projects. Having everything organized before starting saves time and improves results.
Gathering Your Cleaning Supplies
Collect degreasing dish soap like Dawn or Palmolive first. These brands work exceptionally well for breaking down oily residues.
You’ll need warm water for optimal effectiveness. A spray bottle helps apply the solution evenly across vertical areas.
Microfiber cloths provide excellent absorption without scratching. Non-scratch sponges work well for more textured areas.
Keep baking soda and vinegar available for tougher situations. These natural options boost your primary degreaser when needed.
Safety Considerations Before You Begin
Wear gloves to protect your hands during the process. This prevents skin irritation from prolonged contact with solutions.
Consider goggles if using stronger chemical products. Non-slip footwear maintains stability on potentially wet floors.
Proper ventilation remains crucial when working in enclosed spaces. Open windows or use exhaust fans for air circulation.
Pre-cleaning Surface Assessment
Identify all material types before applying any product. Stainless steel, granite, and painted surfaces require different approaches.
Test your cleaning solution on a hidden area first. This ensures compatibility and prevents potential damage.
Remove loose debris through dusting or sweeping initially. This preliminary step prevents spreading dirt during the main process.
Protect adjacent areas from potential splashes. Organize your tools for maximum efficiency throughout the task.
Allocate time based on the severity of buildup and area size. Most projects take between 15-30 minutes for preparation.
Have clean rinse water and dry cloths ready for final polishing. This completes the process effectively.
The Easy Wipe Method for Kitchen Grease and Surface Cleaning
Proper technique execution separates mediocre results from professional-level cleanliness outcomes. This approach combines scientific principles with practical application for optimal performance.
Creating the Perfect Dish Soap and Warm Water Solution
The ideal mixture requires precise proportions for maximum effectiveness. Use a few drops of degreasing dish soap per cup of warm water at approximately 120°F.
Warm water breaks molecular bonds more effectively than cold alternatives. This temperature enhances the soap’s ability to emulsify stubborn residues.
For spray bottle applications, shake gently to combine ingredients thoroughly. Bowl mixtures should be stirred until consistent foam appears.
Proper Application Techniques for Maximum Effectiveness
Spray directly onto vertical areas for controlled coverage. Dip cloths into the solution for horizontal applications and detailed work.
Use circular motions rather than straight strokes for optimal removal. This technique helps lift residues from porous materials more effectively.
Never allow the solution to dry during the soaking process. Maintain moisture for continuous chemical action against stubborn buildup.
Timing and Soaking Strategies for Stubborn Buildup
Light residues require 3-5 minutes of contact time. Baked-on deposits need 10-15 minutes for proper loosening.
Identify sufficient loosening when residues appear cloudy and lift easily. The solution should penetrate completely before wiping attempts.
For extreme cases, sprinkle baking soda before applying soapy water. This creates a fizzing reaction that boosts cleaning power significantly.
Follow the sequential process: apply, wait, wipe, rinse, and dry. This method ensures streak-free results throughout your space.
Surface-Specific Cleaning Techniques for Optimal Results
Different materials require tailored approaches for effective degreasing. Understanding these variations ensures excellent outcomes without damage.
Each area in your cooking space presents unique challenges. The right technique preserves surfaces while removing stubborn residues.
Stovetops and Range Hoods
Begin by removing loose debris from burners and surrounding areas. Apply your degreasing solution generously across the entire surface.
Allow the mixture to sit for 5-10 minutes before wiping. Use non-abrasive scrubbing around burner components for thorough results.
For range hood exteriors, wipe with your prepared solution. Remove and soak filters in warm, soapy water for 20 minutes.
Use a soft toothbrush for mesh filter details. This approach restores optimal airflow and appearance.
Backsplashes and Kitchen Walls
Spray vertical surfaces generously with your cleaning solution. Allow adequate dwell time for proper penetration.
Wipe downward motions prevent dripping and streaking. Use soft brushes for grout lines on tiled areas.
Test your solution on inconspicuous areas for painted walls. Well-wrung cloths prevent streaking on matte finishes.
This method maintains wall integrity while addressing accumulated residues.
Cabinet Fronts and Handles
Focus on handles and edges where residues accumulate most. Use circular motions with your microfiber cloth for effective removal.
A vinegar spritz helps with sticky situations. Avoid oversaturation to protect wood finishes.
Dry immediately after wiping to prevent potential water damage. This preserves the beauty and longevity of cabinetry.
Countertops of Various Materials
Granite requires pH-neutral solutions for safe cleaning. Avoid vinegar or acidic products that can etch stone surfaces.
Marble demands extra gentle approaches with soft cloths. Specific marble-safe cleaners provide optimal protection.
Different materials need appropriate care methods. Always consider surface compatibility before application.
Stainless Steel Appliances
Use soft non-abrasive cloths for all stainless steel surfaces. Damp cloths with small amounts of soap work effectively.
Rub until foam appears and gently soak built-up residues. Always follow the grain pattern when wiping.
Specialized stainless steel cleaners provide final polishing. This maintains the sleek appearance of appliances.
Baking Dishes and Cookware
Soak items in the hottest tap water safe for the material. Add dish soap and allow 15-20 minutes for penetration.
For stubborn cases, consider residual oven heat assistance. Different materials require specific approaches.
Cast iron, non-stick, and aluminum each need appropriate methods. Glass benefits from vinegar solutions for streak-free results.
Proper care extends the life of your cooking vessels. It also ensures food safety and preparation quality.
Maintaining a Grease-Free Kitchen for the Long Term
Long-term success in maintaining pristine conditions relies on systematic approaches. Prevention remains the most effective strategy against persistent buildup.
Address residues immediately after cooking activities. Keep microfiber cloths and spray bottles conveniently located near your stove area.
Run ventilation systems during and after meal preparation. This captures airborne particles before they settle on walls and other surfaces.
Use splatter screens during frying to minimize oil dispersion. Choose semi-gloss paints and sealed materials for easier maintenance.
Establish a consistent schedule: daily quick attention, weekly thorough sessions, and monthly deep inspections. This approach saves time and reduces the need for specialized products.
Regular attention to often-overlooked areas prevents comprehensive issues. Proper disposal practices protect plumbing systems throughout your home.

Ava Harrington is a home improvement writer and DIY enthusiast with over eight years of hands-on experience maintaining, renovating, and documenting residential properties across the United States. She writes practical, no-fluff guides on home care, preventive maintenance, and everyday repairs — helping homeowners protect their properties without overspending or overcompleting.