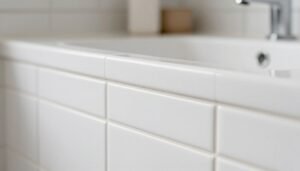
Your home’s hot water system plays a crucial role in daily comfort. Finding the right balance for your water heater ensures both protection and performance.
The ideal setting prevents scalding injuries while maintaining energy efficiency. Proper adjustment meets household needs without wasting resources.
According to the U.S. Department of Energy, 120°F works best for most families. This level reduces burn risk significantly while keeping energy costs manageable.
Every 10°F reduction can save 3-5% on heating expenses. Lower temperatures also extend your system’s lifespan and minimize plumbing issues.
This guide will show you how to optimize your unit for safety and savings. We’ll cover different types of systems and special household requirements.
Key Takeaways
- 120°F is the recommended temperature for most households
- Proper settings prevent scalding injuries, especially for vulnerable family members
- Lower temperatures reduce energy consumption and utility costs
- Correct adjustment extends equipment lifespan and reduces maintenance needs
- Different household situations may require specific considerations
- Regular monitoring ensures ongoing safety and efficiency
Understanding the Importance of Your Water Heater’s Temperature Setting
Proper adjustment of your unit’s dial affects three critical home elements. These include household protection, energy savings, and personal comfort. Getting this balance right creates optimal living conditions.
Balancing Safety, Efficiency, and Comfort
The ideal configuration prevents multiple household concerns. It stops dangerous situations while keeping utility bills reasonable. Your family enjoys consistent performance without unnecessary expenses.
Households with specific medical requirements might need special adjustments. Immunocompromised individuals sometimes require different approaches. Always consult professionals for these unique situations.
The Risks of Incorrect Temperature Settings
Levels below 120°F can encourage bacterial growth in your tank. Legionella bacteria thrive in these conditions and cause serious illness. Maintaining proper heat stops these microorganisms from multiplying.
Excessive heat creates immediate danger for household members. Water at 140°F causes severe burns in under one second. Children and elderly residents face particularly high risk.
Improper adjustment also increases energy consumption significantly. Your system works harder to maintain inappropriate levels. This results in higher monthly costs and more frequent maintenance needs.
Incorrect configurations may lead to insufficient performance. You might experience lukewarm flow or inadequate supply during showers. Proper adjustment ensures consistent comfort throughout your home.
Understanding these factors helps homeowners make informed decisions about their system’s operation. The right choice prevents hazards while maximizing efficiency.
Identifying the Ideal Water Heater Temperature Range
Finding the perfect balance for your household’s needs requires understanding several factors. The optimal range provides protection while maintaining comfort and efficiency.
Most experts agree that 120°F serves as the benchmark for residential units. This measurement creates a protective barrier against multiple household concerns.
Why 120°F is the Recommended Sweet Spot
This specific level effectively prevents bacterial growth in your tank. Legionella bacteria cannot survive at this heat, reducing health risks significantly.
The setting also minimizes scalding dangers for household members. It provides a comfortable experience without extreme burn risks.
Energy efficiency improves dramatically at this configuration. You’ll notice lower utility bills while maintaining adequate performance.
When to Consider a Higher or Lower Temperature
Some dishwashers without internal heating elements require increased heat. Settings between 130-140°F ensure proper sanitization for these appliances.
Cold climate homes might need elevated levels. Additional warmth compensates for heat loss through pipes during winter months.
Households with young children or elderly residents might prefer reduced measurements. Settings around 110-115°F offer extra protection against accidental burns.
Energy-conscious families often choose slightly lower configurations. Small reductions can lead to noticeable savings on monthly expenses.
Always verify your actual output using a reliable thermometer. Test at faucets to ensure your thermostat reading matches reality.
Begin with the standard recommendation and adjust based on specific requirements. Monitor comfort and protection as you make incremental changes.
A Step-by-Step Guide to a Water Heater Temperature Check and Adjustment
Making changes to your unit requires careful attention to detail. Different systems have unique adjustment methods that homeowners should understand.
Always prioritize protection when working with your home’s equipment. Follow manufacturer guidelines for your specific model.
How to Adjust a Gas Tank Water Heater
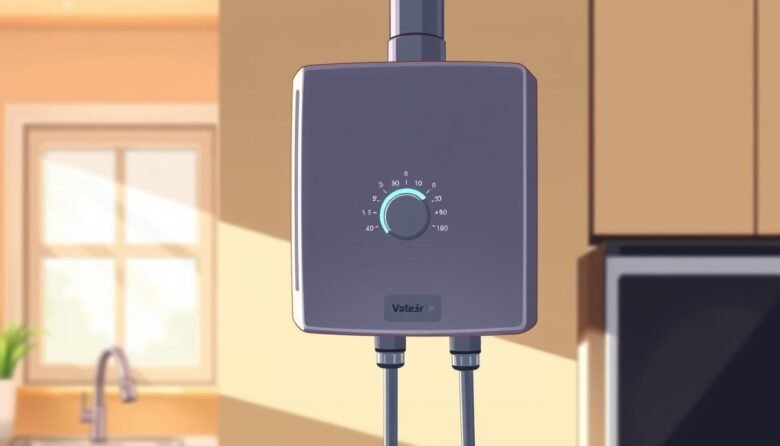
Find the control valve near the bottom of your tank. Look for a dial marked with temperature indicators.
Use a flathead screwdriver to turn the dial to your desired level. Make small adjustments rather than large changes.
Wait at least three hours before testing the output. This allows the tank to fully heat to the new configuration.
How to Adjust an Electric Tank Water Heater
Begin by switching off power at your circuit breaker. Verify electricity is disconnected using a tester.
Remove the access panels to reveal the thermostats. Adjust both dials to the same measurement if you have dual elements.
Replace the panels and restore power to the unit. Allow three hours for the system to reach the new setting.
Consult a professional if you’re uncomfortable with electrical work. Shock risk exists when working with powered components.
How to Adjust a Tankless Water Heater
These modern units feature digital control panels. Use the buttons to select your preferred output level.
Changes take effect within minutes rather than hours. Test your adjustment after a brief waiting period.
Remember that simultaneous use affects performance. Multiple fixtures may reduce output consistency.
Testing the Water Temperature After Adjustment
Run hot flow at the farthest faucet for three minutes. This ensures you’re testing newly heated liquid.
Fill a glass and measure with a cooking thermometer. Compare the reading against your desired measurement.
Repeat the process at different fixtures if needed. Make additional adjustments if readings don’t match expectations.
Patience ensures accurate results throughout your home. Proper verification prevents future problems.
Maximizing Energy Efficiency Through Temperature Management
Smart management of your home’s heating system creates significant savings. Strategic adjustments reduce monthly bills while maintaining household comfort.
How Temperature Directly Impacts Energy Consumption
Your system’s configuration directly affects power usage. Higher settings demand more energy to maintain heat levels.
Heating accounts for 14-18% of average home energy costs. This represents one of the largest household expenses.
Every 10°F reduction saves 3-5% on energy bills. Small adjustments create noticeable financial benefits over time.
Additional Tips for Reducing Water Heating Costs
Insulate your tank and pipes to minimize heat loss. This simple upgrade improves performance immediately.
Use cold flow for laundry whenever possible. Take shorter showers to reduce overall consumption.
Install low-flow showerheads and faucet aerators. These fixtures maintain pressure while using less heated liquid.
Consider timers or smart controls for your unit. These devices reduce operation during low-use periods.
Upgrade to Energy Star-certified models for long-term savings. Tankless units provide excellent efficiency for many homes.
Regular maintenance prevents sediment buildup. Flushing your tank improves efficiency and reduces heating time.
These practices lower utility bills and support environmental sustainability. Combined with proper temperature management, they deliver optimal results.
Addressing Common Water Heater Temperature Problems
Even with proper initial setup, your unit may develop performance issues over time. These challenges often relate to mineral accumulation or component wear.
Understanding these common scenarios helps maintain household comfort. Quick identification leads to faster resolution.
Troubleshooting Insufficient Hot Water
Shortened supply duration frequently indicates mineral accumulation inside the tank. This reduces available space and insulation properties.
Annual flushing removes these deposits effectively. This maintenance task restores original capacity.
Electric models might experience element failure. Professional replacement ensures proper operation.
Thermostat malfunctions cause inadequate heating cycles. Verification requires multimeter testing.
Oversized families may exceed unit capacity. Larger models accommodate increased demand.
Fixing Inconsistent Water Temperature
Fluctuating output often stems from crossed supply lines. Plumbing correction resolves this issue.
Faulty mixing valves create unpredictable results. Replacement stabilizes shower experience.
Thermostat calibration drift causes irregular performance. Recalibration or replacement restores accuracy.
Long pipe runs lose heat during transit. Insulation maintains desired warmth throughout your home.
Regular maintenance prevents most common issues before they disrupt daily routines. Professional assistance ensures complex repairs meet safety standards.
Special Considerations for Household Safety and Needs
Every family has unique requirements for their home’s heating system. Customizing your approach ensures optimal performance for specific situations.
Different household compositions demand thoughtful adjustments. These modifications balance comfort with important protective measures.
Settings for Households with Children or Elderly Members
Families with young members or seniors benefit from extra precautions. Reduced heat levels provide additional protection against accidental burns.
A range of 110-115°F minimizes scalding risk effectively. This adjustment prevents serious injuries while maintaining comfortable usage.
Install anti-scald devices on faucets and showerheads. These fixtures automatically regulate flow to prevent dangerous exposure.
Combining lower settings with protective devices creates multiple safety layers. This approach addresses various potential hazard scenarios.
Adjustments for Dishwashers and High-Demand Use
Some cleaning appliances require specific heat levels for proper operation. Machines without internal heating elements need elevated temperatures.
Settings between 130-140°F ensure effective sanitization. Always consult your appliance manual for manufacturer recommendations.
Large families might need slightly increased levels. Multiple users can deplete reserves faster than average households.
Monitor performance during peak usage times. Adjust gradually until you find the perfect balance for your needs.
Using Vacation Settings for Extended Absences
Extended trips away from home present energy-saving opportunities. Most units feature special modes for these situations.
The vacation setting maintains around 50°F during your absence. This prevents freezing while reducing energy consumption significantly.
Remember to restore normal operation upon returning home. Allow several hours for the system to reach optimal performance levels.
This simple adjustment can cut energy costs during extended vacations. The savings add up over multiple trips throughout the year.
Immunocompromised individuals might require different approaches. Medical conditions sometimes necessitate specific configurations.
Consult healthcare providers for personalized recommendations. Professional guidance ensures both safety and effectiveness.
Regular testing verifies your adjustments work correctly. Simple thermometer checks provide peace of mind.
Consider your household’s unique circumstances when making decisions. The right choices prevent accidents and improve satisfaction.
Implementing Best Practices for Ongoing Water Heater Performance
Maintaining your system’s peak performance requires consistent attention to detail. Annual flushing removes sediment that reduces efficiency. Regular anode rod inspection prevents tank corrosion.
Insulate pipes and the unit to minimize heat loss. Fix leaky faucets promptly to avoid energy waste. These simple steps lower operating costs significantly.
Schedule professional inspections to catch issues early. Consider energy-efficient upgrades for older systems. Using cold flow for laundry reduces demand.
Implementing these practices ensures reliable operation for years. Proper maintenance provides peace of mind while protecting your investment.

Ava Harrington is a home improvement writer and DIY enthusiast with over eight years of hands-on experience maintaining, renovating, and documenting residential properties across the United States. She writes practical, no-fluff guides on home care, preventive maintenance, and everyday repairs — helping homeowners protect their properties without overspending or overcompleting.